Our Contract

Pre-start Documentation

Previously, I went into some detail on the sort of clauses one should include in the contract to build the house. (See The Contract part 1 and part 2)

Here is what we did with the contract for OUR build.

After the selection process, we had already chosen the builder (see choosing the builder), so our next meeting with him was to formalise the agreement

I set about drawing up the contract. I told him I was going to do that and to be fair, he did not jump in with an offer to do that for us!

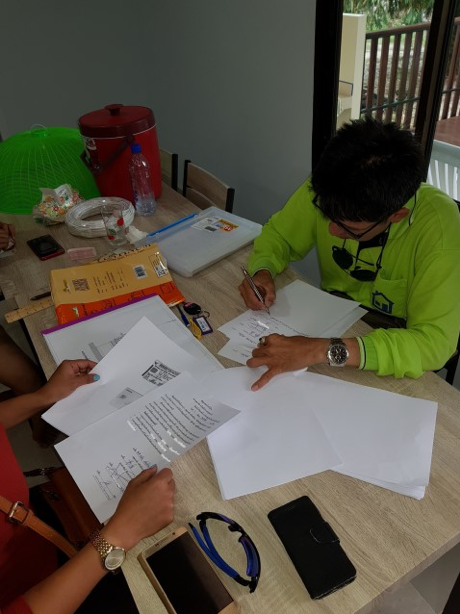
Checking the contract

The build itself as going to produce a home with 4/5 bedrooms, 6 bathrooms, 8 WC’s, gym, cinema and all over approximately 500m2 on 2 floors. Due to how we initially intended to build and live at the property, the build was sub-divided into 3 areas – zone 1, 2 & 3 and would be covered under 2 contracts

The first contract

This contract covered the building of zones 1 and 2, plus the foundation piling only for zone 3

I first broke the work down into achievable sections. Liaison with the builder is important and if we were going to develop a good working relationship with him, he had to be involved every step of the way. Those broken down sections were discussed and with a little tweaking we agreed the work in each section, and the money that would be paid on completion of each section. Then the contract was finalised

The opening section of the contract defined the parties involved in the build – the builder, the employer, the engineer, plus contact details.

Then came those work sections – piling, plinth beam / floor slab, ground-floor columns and first floor ring beam planking, ground-floor walling, roofing, first floor walling, plumbing, electrics, rendering, finishing, plus the retention for the snagging list completion. Each section had an amount to be paid once fully completed, and an indicated timescale to complete.. We stated that inspection and agreement would be completed before ‘signing off’ on each section.

Then came specific materials and finishing detailing, each requirement on a separate clause in the contract. This included particular external wall blockwork – Q-con block – 150mm on exterior wall, 100mm on internal walls, solid teak doors and windows, particular roof tiles, and where a definite material could not yet be defined, e.g. paint wall colour, it was specified as ‘to be agreed’ before applying. Same for the wall and floor tiles, and the lighting units, wall sockets and switches. This detailing extended for example, to measured location of sockets on the wall

To cover himself for this (the contract must be fair, remember) the builder allocated sums of money either as a per-unit cost or a M2 cost in the contract supporting document.

This part of the contract also detailed what was excluded – in our contract, this included the AC units, and the sanitary-ware.

It was stated in this contract that if we wished to have a particular finish that exceeded builders set budget we could simply pay the difference to acquire what we wanted.

The final section of the contract related to the various parties conduct throughout the contract – following the plans and contract exactly, changes by agreement with notice (on both sides), worker conduct, safety, clear up, security etc.

Over 56 separate clauses in the contract to build zone 1 and 2, but still I managed to miss one vital inclusion, and the resolution of this was a measure of the integrity of our builder.

So… the contracts were drawn up in Thai and English, and both the builder and I signed all copies. Our wives acted as the witnesses on the documents. One set of copies each and we were ‘’ready to start’’!

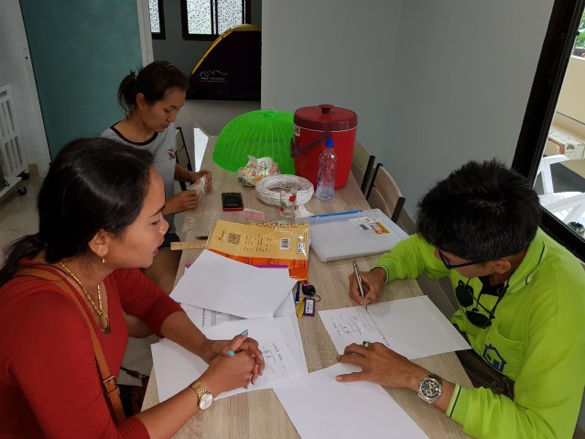
Signing the contract

Oh…for those interested, my missing contract clause related to, of all things… termite control!

It might seem like a small thing…’’little termites’’? What’s the problem? But…it’s a requirement to have termite control. I only realised my error after the build commenced and so got ready for an ‘extra’ charge as it was not in the contract. My fear was unfounded – our builder had included termite control in his costings and quote, and had already made the necessary arrangements without me having to request it.

The second contract

This was for the construction of zone 3. It basically followed all the clauses as laid out in contract 1. Of course there was no piling section as that was fully covered in contract 1, and no kitchen to construct, but there was a gym and cinema which required different finishes to what was built in zone 1 and 2.

So… pretty much the same contract detail as the first contract but yes… in this one I did include that termite control requirement!

The Contract –part 2

Pre-start Documentation

Theft

Theft can occur in any country and building sites are a rich source of steal’able materials and equipment. If your builder loses all the roof tiles overnight, what happens? Similarly, if someone ‘borrows’ his power tools or his JCB, again who is responsible. It is vital to clarify this in the contract. HE is responsible for materials and equipment, not you. If anything is stolen, he has to replace the items. This will probably encourage him to keep some or all of the building team on site day and night which is a good thing from a security viewpoint.

Are we being hard on the builder? No…not really. Some builders who are not under a clause in the contract making them responsible may well ‘sell’ equipment or materials and you have to replace them. Often those same materials come back after a payment for new has been made. I’m not saying all builders can do this but, again, by specifying clearly in the contract, this can be avoided

Site clean up

This is very often forgotten, but can be a massive cost if the responsibility is not clarified in the contract. Make the builder responsible and there will be less waste and also an ongoing clean-up as the work progresses.

Snagging list

Every build has some issues along the way. Things might not turn out as you planned. The builder may try to cut a corner. There might be a finishing issues with paint or stain. Remember…once you have made the final payment you are in a much weaker position to get things rectified. The builder has had all his money – his focus is on the next contract.

If you retain a portion of the contract value that is only released once all the snagging issues are fixed the builder is much more likely to sort out his mistakes. Ideally that snagging list retention payment is quite large – possibly the bulk of his profit. It is in his interest to fix everything in order to get all his money. Include this snagging list payment in the contract.

Following the contract

It may seem obvious but, especially where it is important, it needs to be stated for clarity that the contract must be followed. For example, the Thai way with electrical installation is to put one or two outlet sockets on the wall and then add more using plug-in gang sockets. If you have carefully illustrated 7 or 8 double wall sockets in your kitchen, I’m guessing you would be less than pleased if the builder thought it was too many and instead fitted 3 single sockets and assumed the shortfall would come from plug in extensions. Enforce the specification. Ensure the clarification. Build to your satisfaction.

The builder needs to understand he is bound to the contract and any changes must be discussed and agreed in writing.

Penalty clauses

Some people want to add this in but I did not for our build. It can put unnecessary pressure onto the builder, who might cut a corner to achieve the deadline. If you start fining the builder he might lose interest or walk off the job. You want the builder to do the best job possible. I see the penalty clause as counter-productive if you have got a good builder and a good relationship with him. Mostly, the build time will be what it will be and both sides should be flexible – within reason of course.

Negotiating and agreeing the contract.

Remember, the contract comes AFTER the builder has given you his construction price. You use that as the basis for working out the stage payments. Firstly, you try to break the contract down into stages, and get agreement for them. Then discuss a realistic timescale in days to complete each stage. Then agree the cash that will be paid. Always pay the stage after it is completed. This encourages completion! It’s not a penalty clause but it does focus the builders mind! Then, discuss and agree the commencement date on site.

Write all those discussions up and, importantly have the contract in both Thai and English. Let the builder read it through. If there are any last-minute changes, come to an agreement and then write them in. and that’s it.

Print up both Thai and English copies of the contract, 2 copies of each. Both you and the builder signs each copy with witness if possible. We used our wives as the witnesses. Each party has a copy of the Thai and English contracts all signed up. The only thing then is to get the build started.

In closing…

Remember, the contract you finalise needs to be fair. Both you and the builder will eventually put your names to it. Take your time. Consider and include elements to get out of it what you need. Make it achievable. Make sure the builder understands what it stands for. Time spent at the start, sorting out this important document will ensure the build goes smoothly once the work commences.

The Contract – part 1

Pre-start Documentation

The contract may seem to be just a formality, just another ‘bit of paper’…but it is in fact a most important document.

In it, you lay out how you want the build project to progress. It contains key elements, to clarify what you expect from your builder and in turn the builder has a recognition of progress, and of course… a reference for payment.

The contract should not be rushed. It should be considered. Call upon personal knowledge, previous documents (if you have been involved in the building of a house before), external references such as the internet, contract books, etc. when drawing up the contract to make sure you include everything.

Firstly…here is what NOT to do. Do not let the builder ‘help you’ by drafting or producing the contract. This will be the most one-sided document in history! Something like ‘pay me at the start of the stage’ or ‘split the cost into 3 or 4 and pay in advance’, or ‘pay me the contract value up front and in return I will deliver the house build at some point (undefined)’!

Obviously, that is not good

Before you start

You need to decide a few things before even drafting a contract. Is it a full contract? Or build only – will you purchase materials and the builder supply labour and expertise only? Will you organise specialist trades, such as plumbers or AC engineers, at set points?

The structure of the contract should include some basic elements

Timescale

Include both stages and overall timescale. There needs to be a check at each stage of the build to make sure work is completed before moving on. This is a key element of the contract – it prevents the builder fulfilling parts of different works and then justifying a payment even though no stage has been completed. Complete each stage to get paid.

Payments

Linked to those timescale stage are the associated payments. Payments should NEVER be in advance. If the builder says he can only do the job if he has large amounts of cash up front you have to question the builder’s ability to deliver the project at all. Is he really that hand-to-mouth? What happens to your cash if he has a crisis at home? Of course, your cash will sort out his problem…but then he is again short for your project.

Also, beware of potential builders wanting huge up-front payments – some up-front costs can maybe be justified, but some builders may just build nothing and do a runner with your money.

Inclusions in the contract other than the build

What about the conduct of your builder and his crew? If a situation develops, say with a neighbour – who is responsible if a cost is incurred? This is important – this must be the builder’s responsibility – he is responsible for how his building team behave. That needs to be in the contract.

What about accidents? Can your builder come to you with a massive claim if his roofer falls and breaks his back on your property? Again – needs to be clarified.

Material specifications

Here is where your careful research into the finishes you want in the build are detailed. Yes, really. If you want an XYZ tile in bathroom 1 and an ABC tile in the kitchen – specify it. Tile. Reference number. Colour if relevant. Supplier. This again avoids the builder just sticking plain white budget tiles everywhere. He is building it but you will live in it. You need to be happy with the finishes and he needs to provide them. Be clear and specify everything to avoid doubt.

Changes to the contract

After thinking the contract through, agreeing it and signing it, that’s it right? It could be, but we all know that in the real world, things can ‘come up’ along the way – a change of specification, a solution to an unforeseen problem, a different way of doing something and there needs to be a mechanism in the contract to consider this.

As a start, it should be specified that notice and agreement must be in place before any contract variation takes place. This stops the builder agreeing everything and then cutting corners with materials of labour quality to save money. Notice of change must be given and agreed, not just given. This obviously favours the owner as his change is likely to be adopted as long as any additional cost is paid.

And, changes to contract that make savings should also be detailed. What happens to those savings? Who gets the benefit? It is important to write this into the contract.

Design

Pre-start Documentation

The design is our own, but of course there are influences. It had to suit the climate. It had to be, or appear to be older and traditional, i.e. not a modern box. It had to make use of up to date technologies and building practices. Those requirements led to investigating history AND looking at local building techniques.

Materials research, traditional layouts, historical features – all were thoroughly checked out and incorporated into the design. That design was then sketched out and transferred into a format that could be used to generate plans.

Initially we used HomeByMe by Dassault Systems to draw the floor plan.

It’s free for practise, with some low-cost add-ons for 3D, etc. and it’s fairly easy to use. It was a toss-up between this and our second trial – HomeStyler from AutoCAD. Again, easy to use, free to trial and with good, clear outputs.

Features for the design

As you know from my earlier posts, we wanted a traditional-looking construction, but with modern building practises employed.

  • Therefore, the construction will be RC frame, and block and cement, with plank and slab flooring, rendered and painted walls on the ground floor, clad on the upper floor

Heat Reduction

  • To help in heat reduction we will use Q-Con from SCG (Siam Cement Group) or Superblock by the Superblock Public Company Limited (or similar) block wall construction
  • Similarly, heat reflection under the roof tiles
  • Air flow-through in the roof void to remove the hot air
  • Large roof overhangs to keep the sunlight out of the windows
  • Not excessively large windows – in keeping with tradition and higher up on the wall.
  • Some cathedral-style roofs on the upper floor. All ceiling height is already 3m but I hope to add 1-1.5m of additional clearance upstairs by raising those upper floor ceilings, thus lifting any warm air even higher from the living space
  • Matched A/C throughout based on room volumes and hopefully cooler starting point.
  • Investigating options with heat-reflective glass for the windows and folding patio doors
  • Use of rainwater harvesting to reduce reliance on other sources, and cut some long term running costs
  • Use of grey water for irrigation along with any rain harvesting excess

General Layout considerations

  • Master bedroom suite ‘wing’ with dressing room and full sized en-suite. Apparently we spend a third of our lives in bed so…might as well have all the comforts to hand
  • Large indoor kitchen with breakfast bar, island – kitchen the heart of the house, right?
  • Separate dining room for more formal dinners, etc.
  • External kitchen BBQ area for the obligatory incinerations
  • Large lower level shaded external sitting area – my design plans one 10m x 8m
  • Minimum 4 bedrooms – family plus guests needs it
  • Indoors living area, but by having a folding door arrangement, this ‘extends’ out to outdoor living space on the 1st floor verandah
  • Separate office. I am planning ahead that this could become a downstairs bedroom if the stairs become too difficult.
  • Well…it’s that or install a lift
  • Area to add gym and TV room in the future (under building 3)
    By having the large external area at ground level, and with access from the kitchen, and with a WC provision under building 3, visitors never need to go ‘upstairs’ keeping that as our private living area.(so I can slob around in peace, with no witnesses)

Electrics

  • once completed, I see three buildings x 2 floors so… 6 electrical zones x lighting and power point circuits, plus cooker circuit and external lighting circuit, so 14 breakers (the electricians out there can correct me if this is overkill)
  • Sufficient power points in each room! 
  • low-energy lighting where possible
  • a properly (to western standards) earthed system
  • External security system, CCTV, etc.
  • House intruder alarm system

Plumbing

  • Separate systems for black and grey water
  • All black water furniture to be against or very close to external walls
  • Three smaller septic tank arrangements, passing the fluid element to a single tank adj to the drain field
  • Water holding tanks to regulate the supply to the house

External

  • Provision for swimming pool later
  • Privacy with perimeter wall, after house is constructed
  • Japanese-style ornamental fish pond (no…not a fishing lake, darling) near to dining room

Special requirements

  • Buddha room
  • Privacy

… check and…check!