First Floor Planks

First Floor Construction

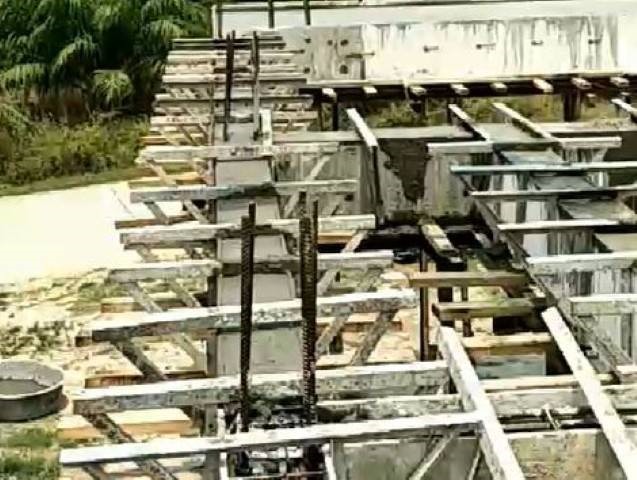
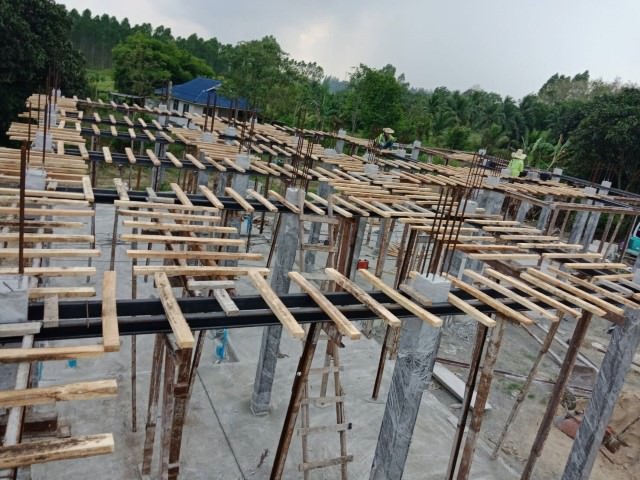
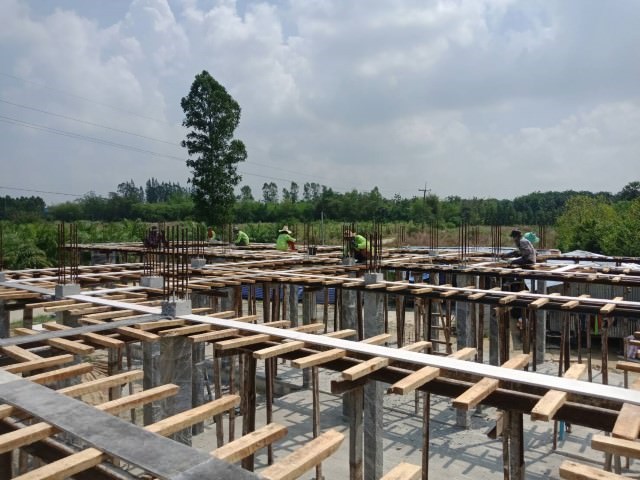
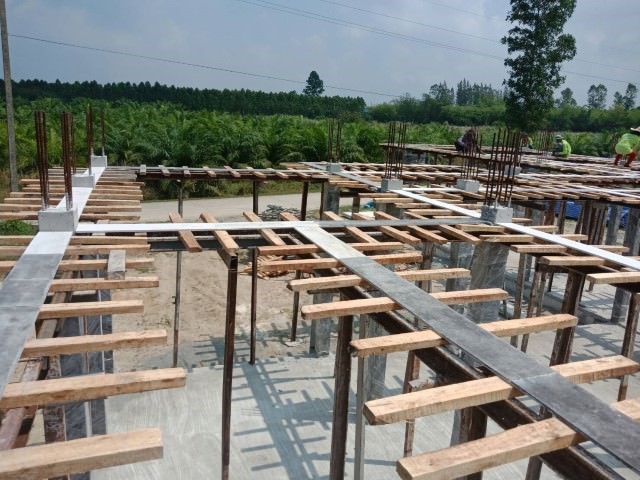
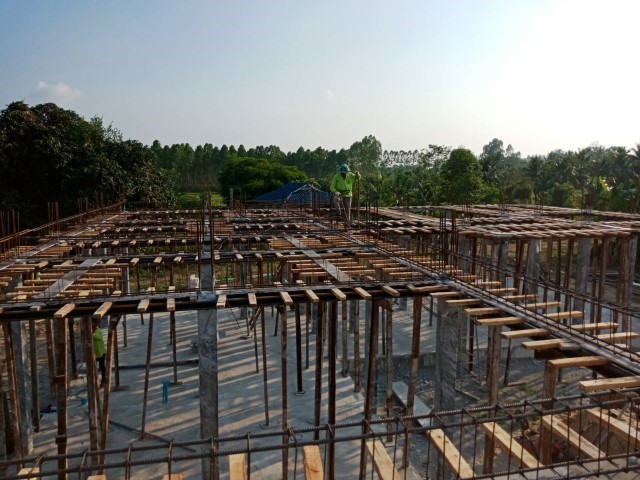
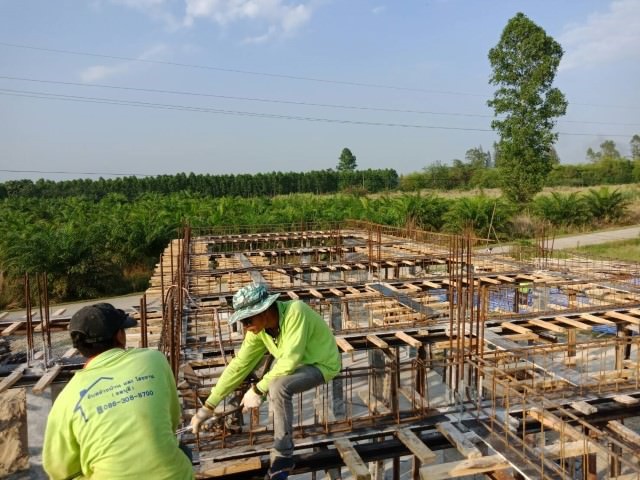
With the first-floor ring beam now cast, the next stage is the placing of the floor planks.

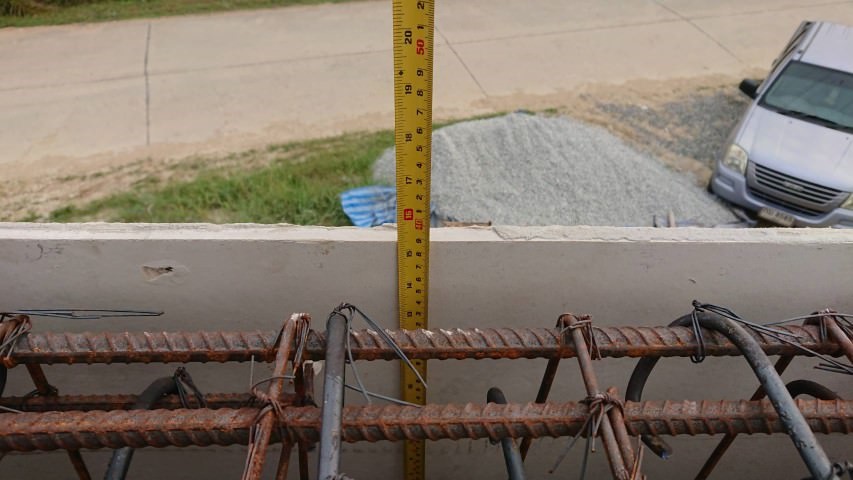
As before, K.Pot checked the ring beam was solid and ready, then re-checked the spans between the beams. This was to ensure the right length planks were purchased.

As mentioned before, it is not only the length calculation to specify the planks. As the length increases, it is important to make sure the plank can carry the load – longer planks require a greater density of rebar inside, and may even become thicker as a result of the increase in steel

With the required information gathered, he placed the order with the plank supplier. A few days later, the flatbed truck turned up, loaded with planks. The planks had been loaded in a systematic way so that they could be unloaded in a sequence of placing. This was also worked out by the builder beforehand, to make the plank placement a lot easier.

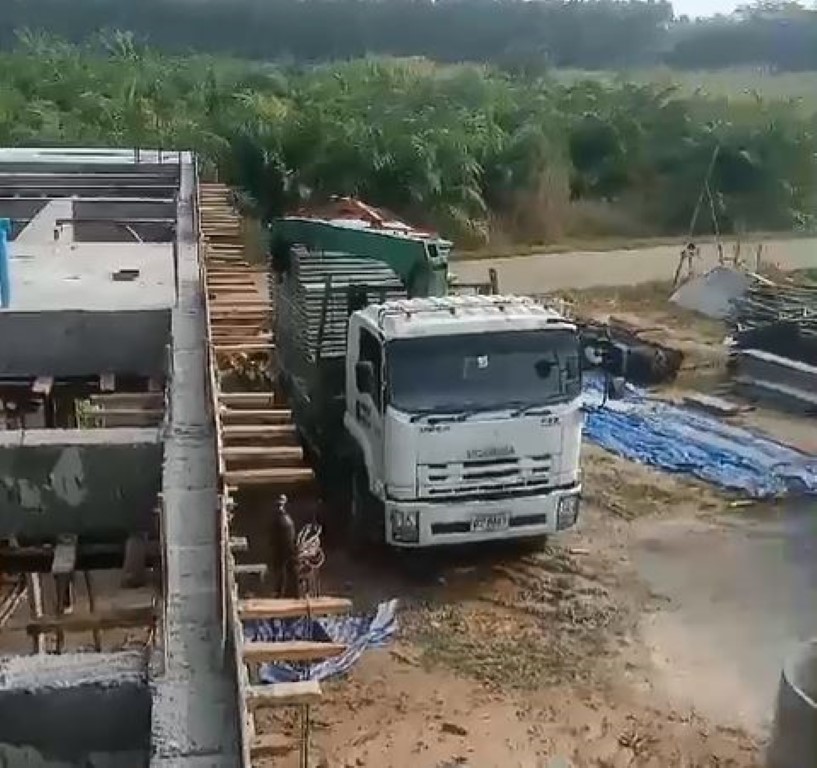
The truck came with a crane attachment and further, a lifting frame so that multiple planks could be raised up in one lift. This speeded up the whole placement process.

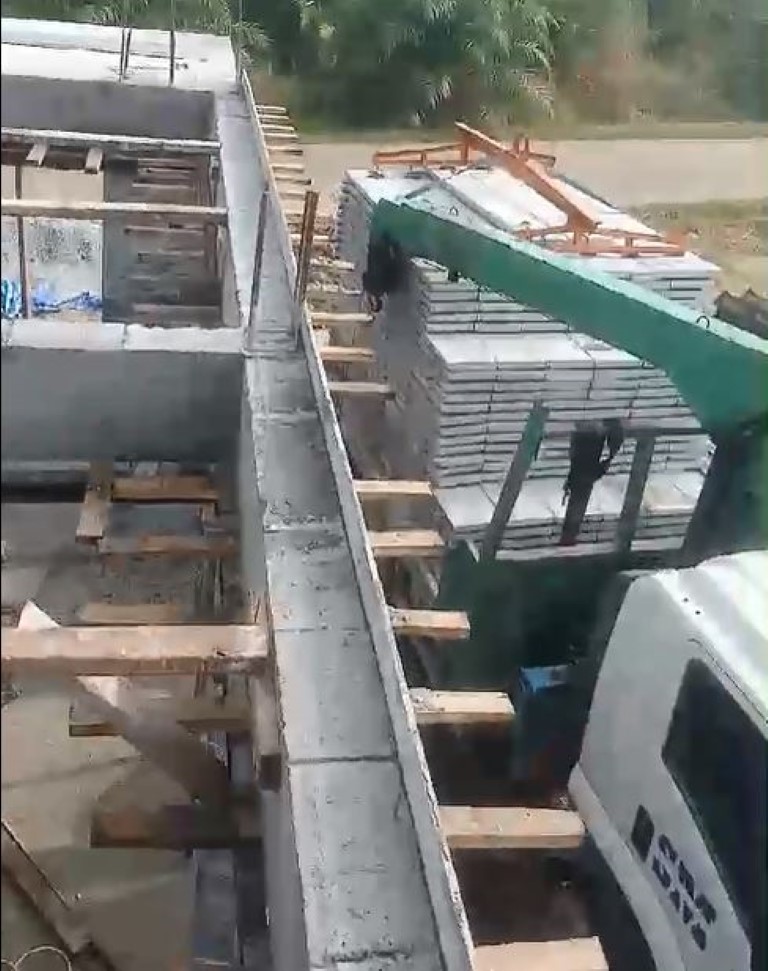
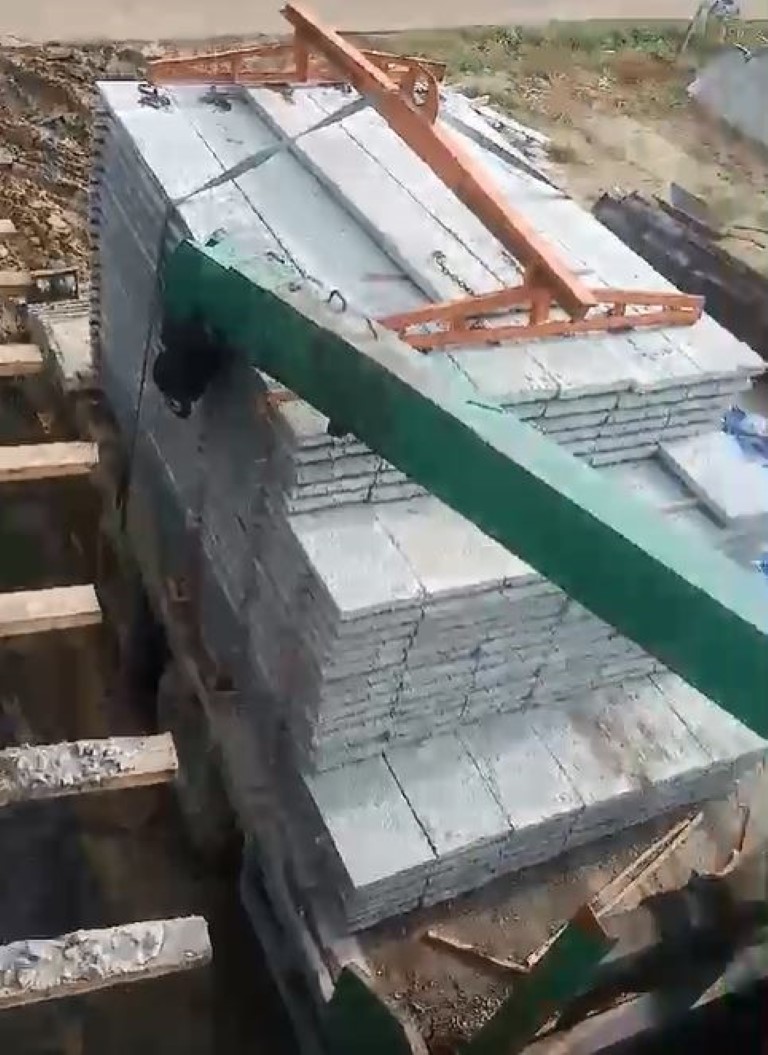
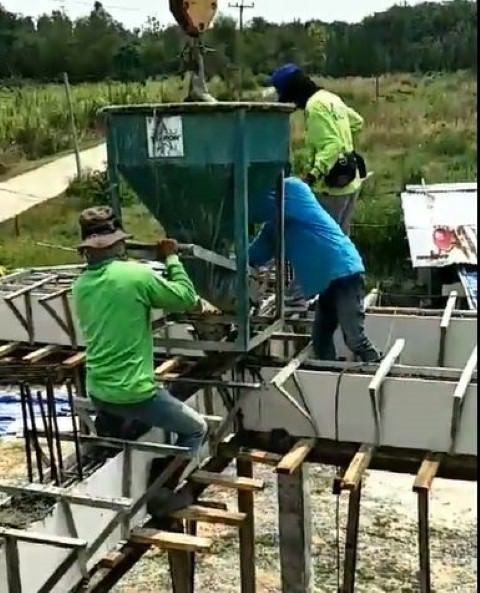
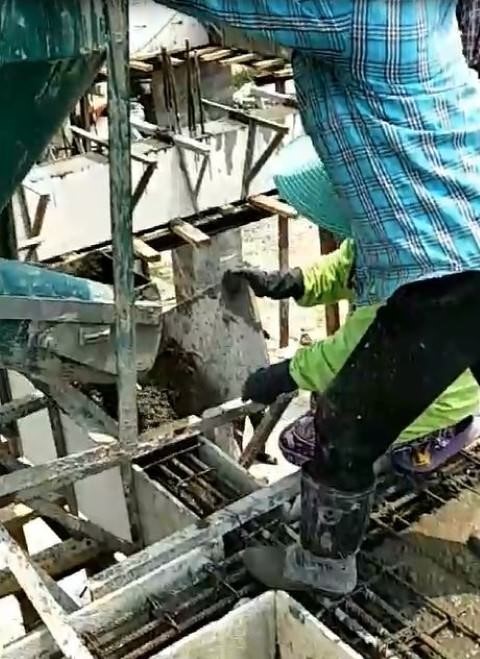
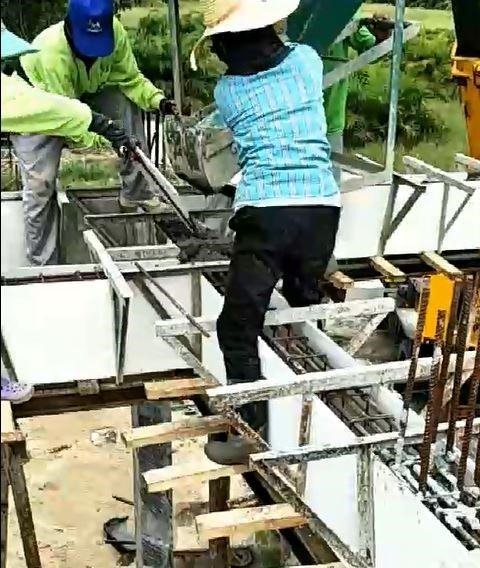
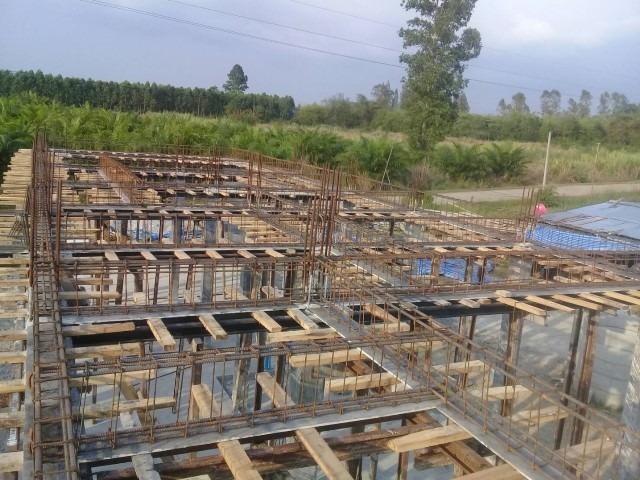
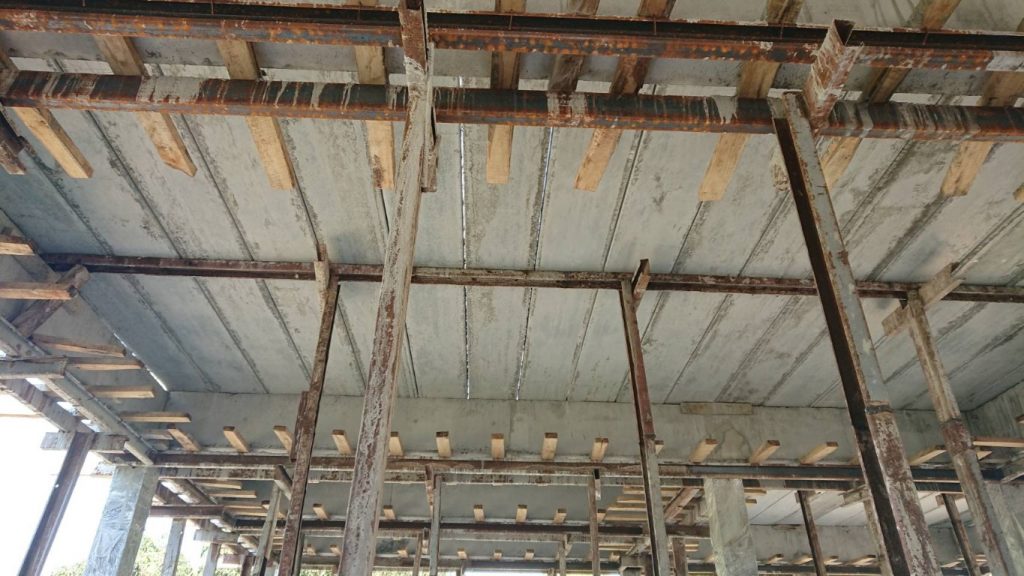
As each set of planks was raised, the building crew crow-bar’ed them into final position, making sure they were butted right up together. The first floor soon took on a solid appearance as the planks were placed, but it was important to remember… those planks were not yet secured, they were only sitting in position by the weight of the plank itself and could still move if any force was applied to them sideways and they could fall. With regards to this, while the plank placement was taking place, no one was allowed on the ground floor under the planks at all…safety first. The checking underneath came after all the planks were placed.

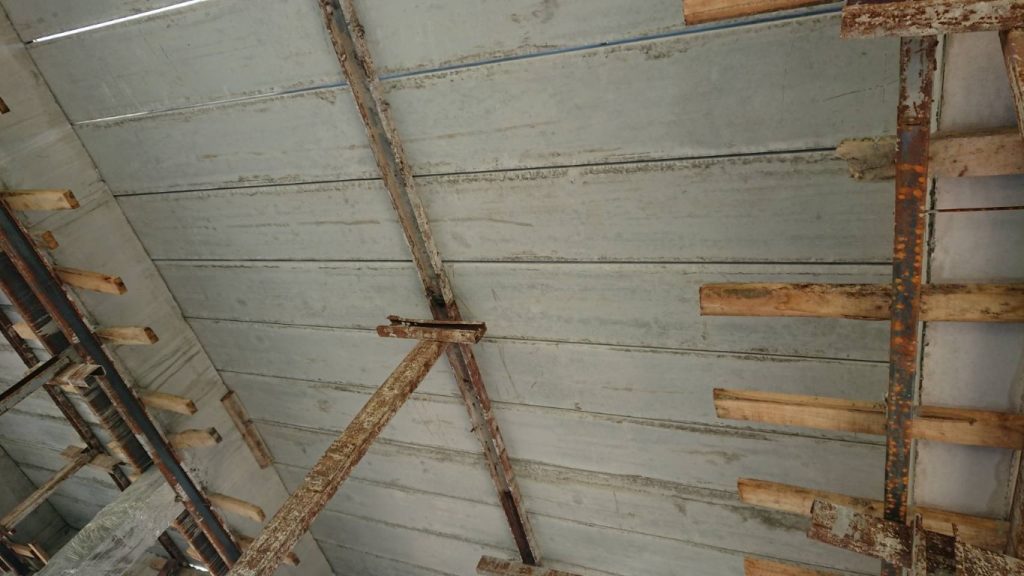
During the plank placement, it was necessary to make small cut-outs on some plank corners to fit around the locations of the first-floor columns

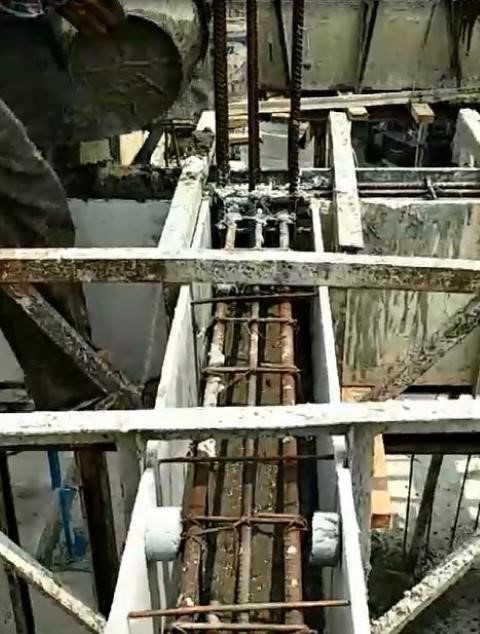
Finally, all planks were in place and the first floor was ready for the next stage – re-enforcing mesh placement and concreting, but before that, another separate stage had to be completed – the casting of the first floor columns.

Construction of the 1st-floor ring beam

First Floor Construction

Concreting

Yes! It’s concrete time, again…

With the steel and shuttering all in place and checked, K.Pot ordered the delivery of sufficient concrete to pour the entire ring beam in one go. It would have been too much to try and mix this quantity on-site, so mixer trucks were organised to deliver the wet concrete to the project.

In the collection of work vehicles, the build team had access to a crane and concrete skip, so all the mixer truck had to do was reverse up onto the site and fill the skip. The crane would then lift the concrete batch up to the ring beam location, and the process was repeated until the mixer truck was empty.

Once the trucks started arriving it was ‘all hands to the task’’ as the skip was repeatedly lifted to the ring beam, and unloaded into the shutter. Care had to be taken to make sure the shutter was totally full of concrete, but not over full and spilling out onto the floor below.

It was also important to make sure the concrete had ‘flowed’ around the steel rebar, so that there were no air-pockets inside the beam. Air pockets would create a weakness in the beam, which could lead to floor failure if the beam collapsed. To prevent this, the foreman allocated one worker to be in charge of the concrete vibrator to help the concrete completely enclose all the rebar.

While the concrete pour was taking place, the foremen and one other worker were constantly checking the shuttering to look for leaks or possible failure potential. We think of concrete as a hard mass of rock-like substance, but in its wet-state it has hydraulic properties, especially with regards to pressure. Even in a shallow shutter, the mass of wet concrete is constantly pushing out, trying to escape the shutter, in a way that hardened concrete would not. The deeper the shutter the higher the pressure as you go down. It is less relevant in beam shuttering but much more so in column shuttering.

Once the bulk of the shutter pour had taken place, some finishing work on the shutter had to be carried out by hand. A smaller quantity of wet concrete was placed in a large bowl and then bucketed to where there was small dips in the surface, to bring it up to level.

At the same time as the beam was poured, the team also poured the floors for the bathrooms, which were lower than the actual beams, so that they were completed before the main floor slab (the next task) was planked and poured..

Construction of the 1st floor ring beam

First Floor Construction

Rebar and shuttering

With the ground floor slab now completed, and the first floor columns cast, the team turned their attention to constructing the shuttering for the first floor ring beam. This involved creating a beam base (simple a flat sheet, which would ultimately have secured sides to form a shutter around the rebar rods), held up by wooden supports made from bamboo.

On top of this beam base, the team laid out lengths of rebar, and then formed the metal ‘frame’ that would ultimately sit inside the concrete beam. This frame consisted of the straight rebar lengths, joined together if not long enough to complete one span, and smaller rebar sections, bent to form a rectangle which was then attached to the straight lengths, using binding wire.

Once all the rebar frames had been completed, the foreman checked each section of the frame to make sure they had been secured correctly and sufficient rods had been used.

It may look like the rebar rods were just joined together haphazardly, but in fact a lot of design detail was incorporated, based on the calculations.

Err…what calculations?

Well, the beam that was approved to be cast has to be of sufficient strength to hold itself up, plus the floor slab that sits on top of it, plus the concrete skim layer above that, and any furniture and people coming into the house after. If incorrect calculations are used, it could result in the beam breaking and the floor collapsing.

Factors to consider in the calculation include:

  • The length of the span – how far it is between walls
  • The weight to be supported – what the beams will support.
  • The overall number of  beams
  • The grade of concrete used
  • The size of the rebar rods
  • The number of rebar rods used
  • The cross sectional area of the beam

The calculations are initially carried out by the architect – after all it is he who is generating the final plans for approval. Once the plans are submitted, the OrBorTor engineer will X-check those calculations against the standards for building in the province.

Maybe some design changes will be required, maybe not, but in our case, the calculations were good and finally the beam specification is agreed and the plans are approved. The rebar and indeed the overall beam design is then carefully followed to comply with those calculations and the planning approval.

Once the rebar frame had been constructed everywhere, the sides of the shutters were then fixed on, creating an open topped box. Again the foreman checked the integrity of the shuttering around the rebar cages, and also that the chairs were fitted correctly, to make sure the metal cage would be completely enclosed in concrete, when it was poured.

Once all the checks were made, it was time to pour the concrete!