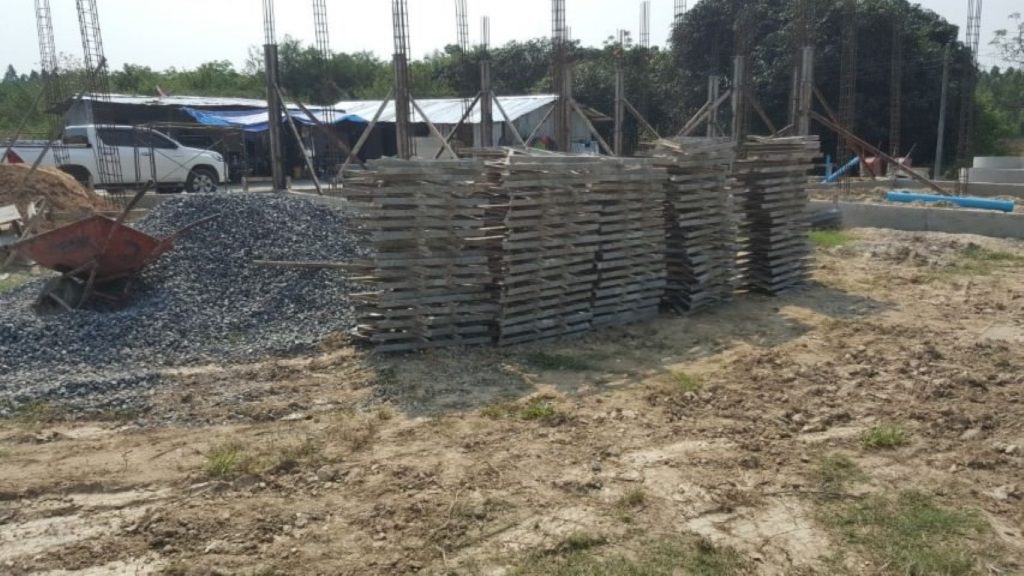
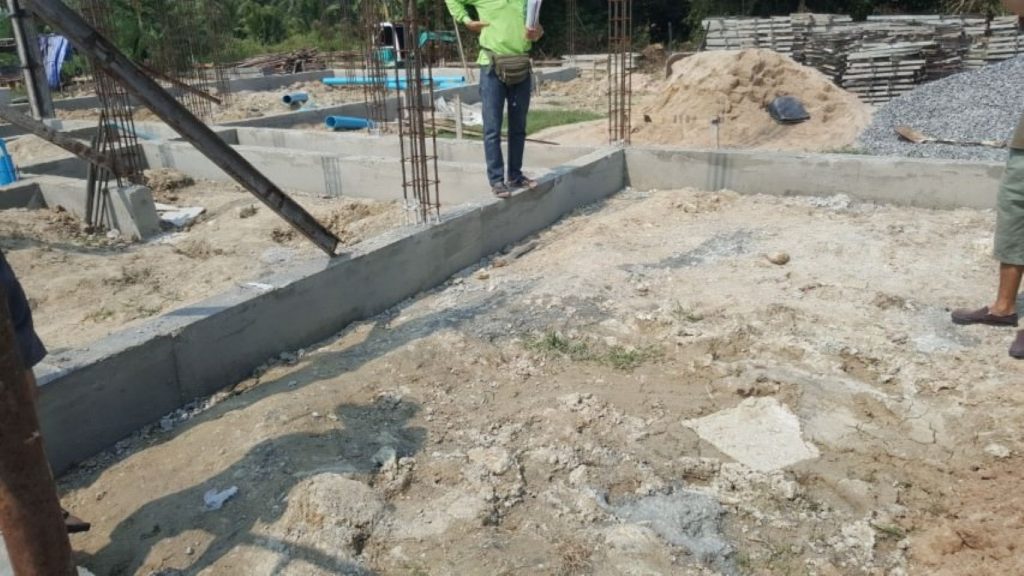
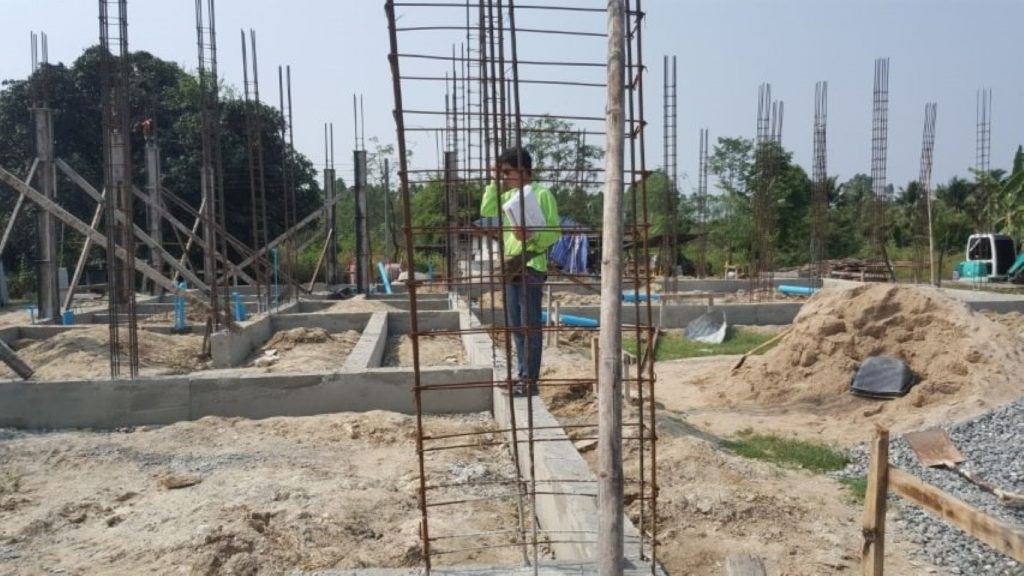
Ground-floor pipework: water in – waste out

Plumbing

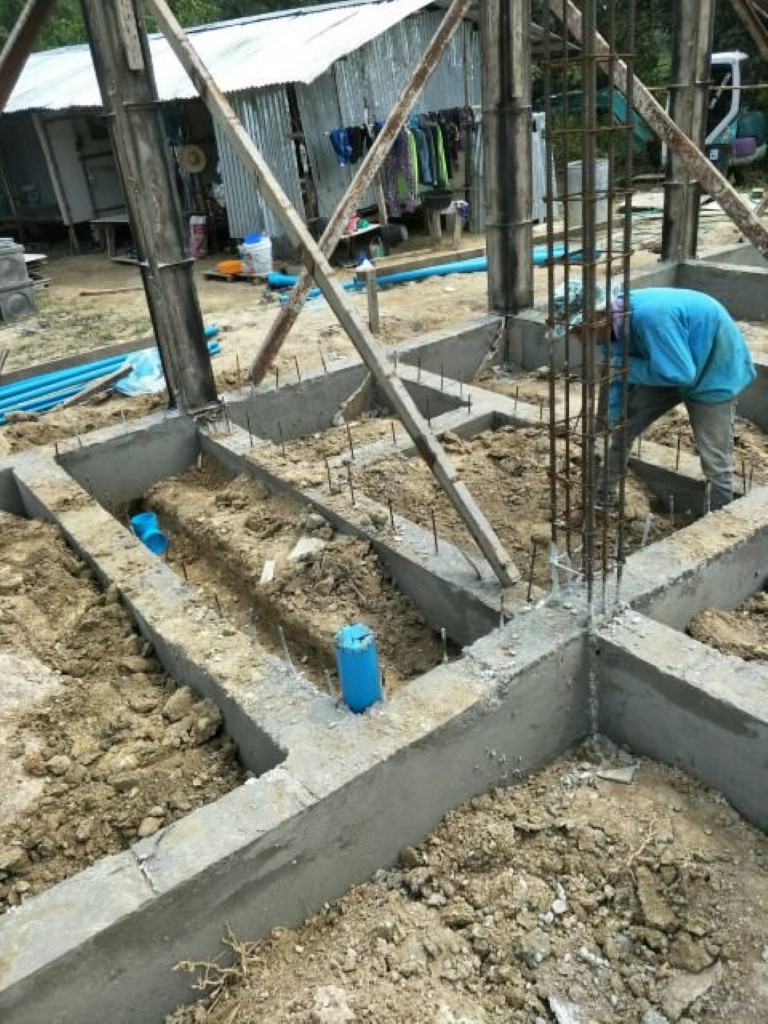
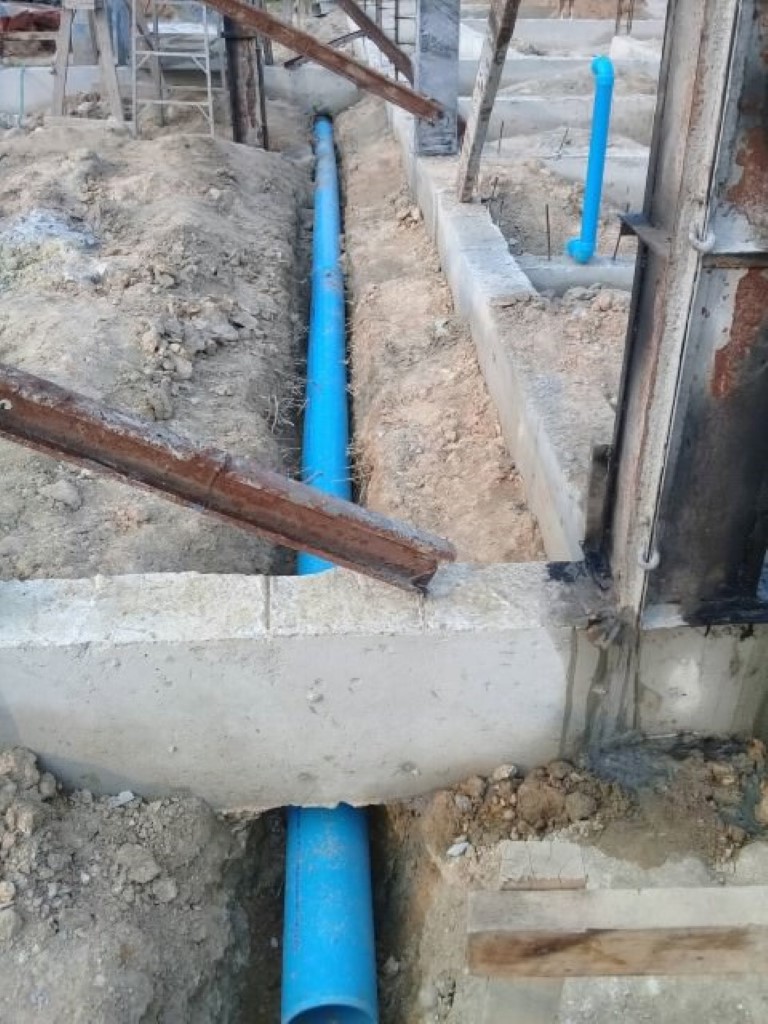
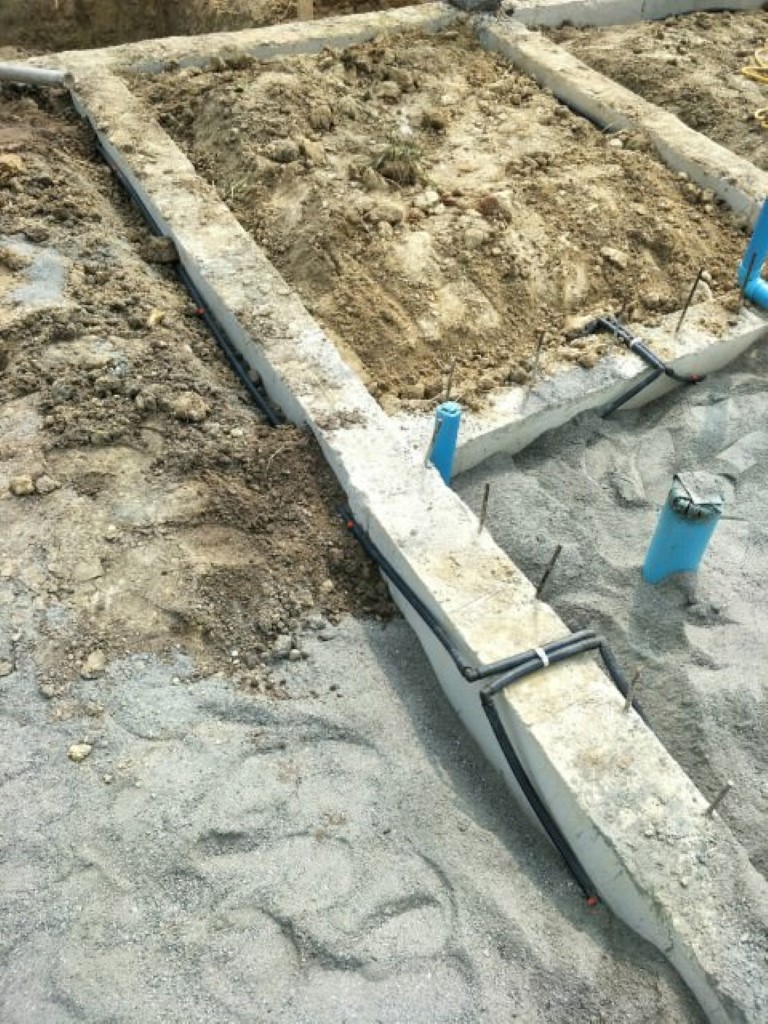
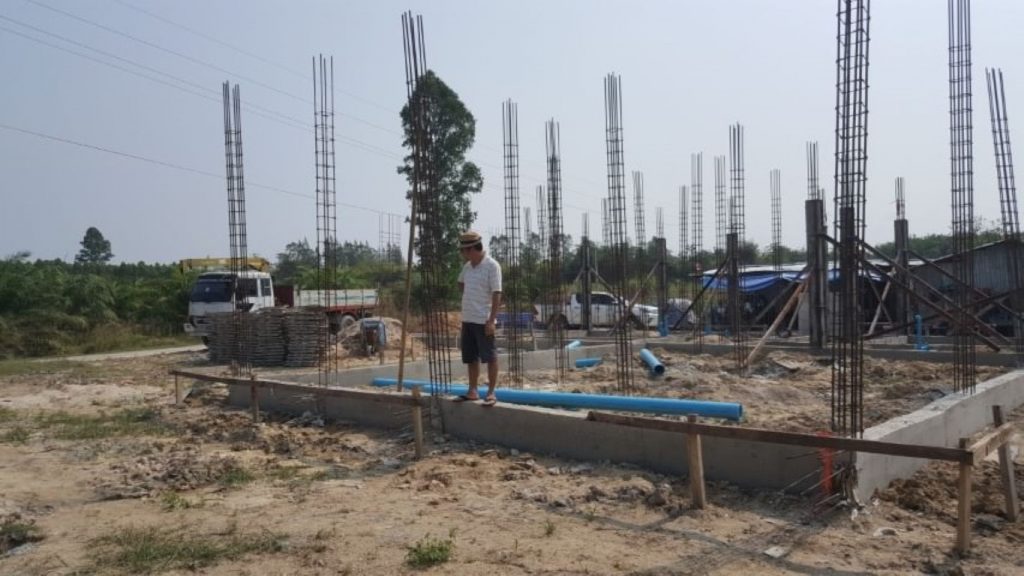
Around about this time, we needed to think about the plumbing lines – water in, and waste water out. In our build, this was further complicated by splitting the grey and black waste water, so that the septic tanks did not fill up every time we took showers or a bath!

Again… this is planning ahead. If the issue arises during the build, you are prepared for it. In this case, we had a plan in the future to use the grey water for irrigation. The septic tanks, all three of them, were for toilet waste only (see the separate post on tankage).
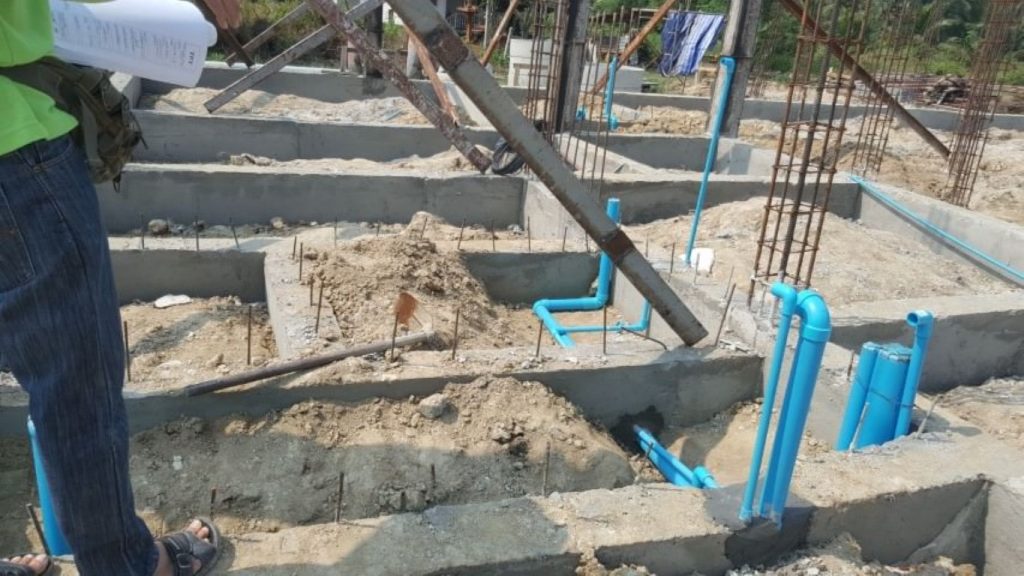
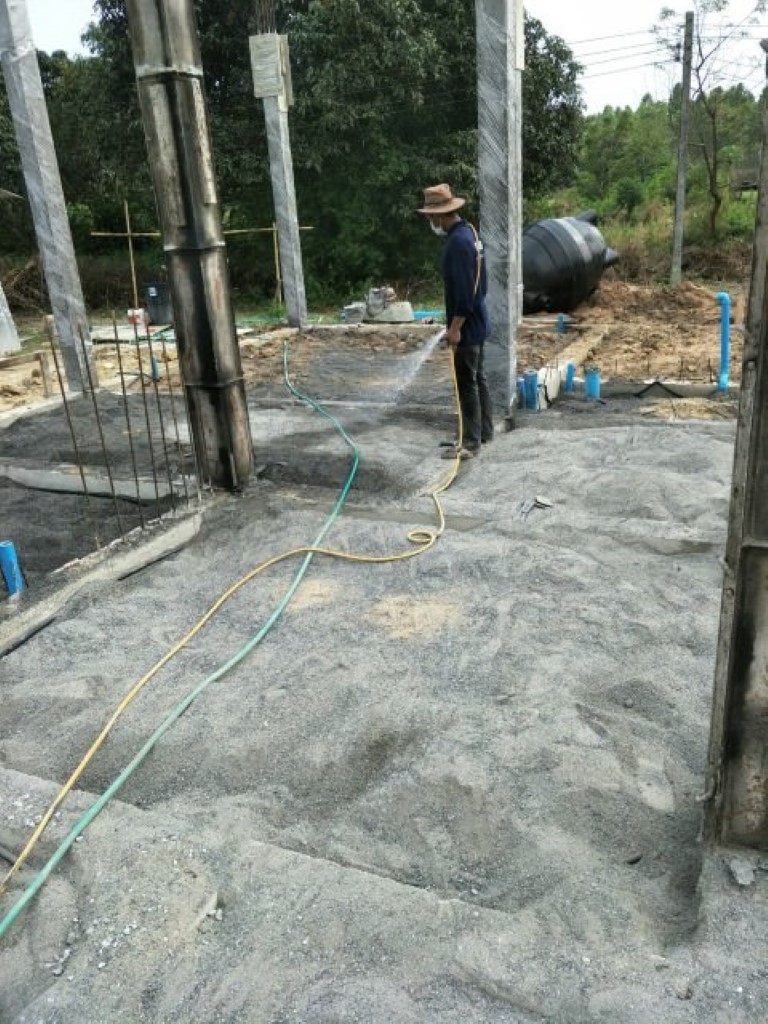
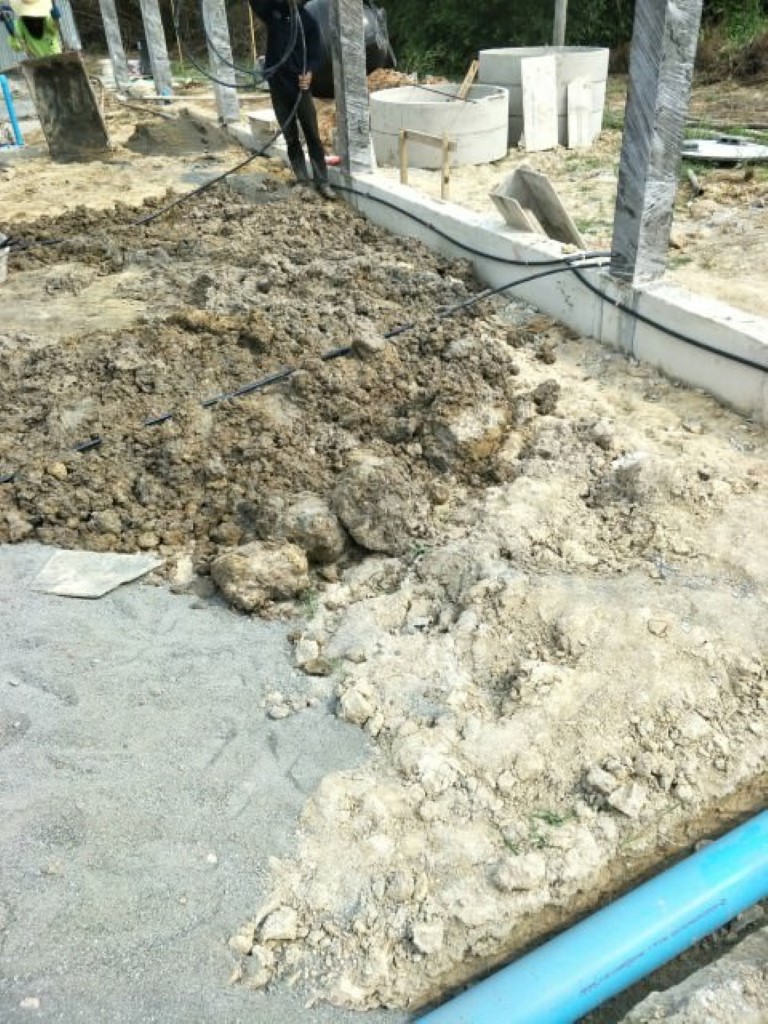
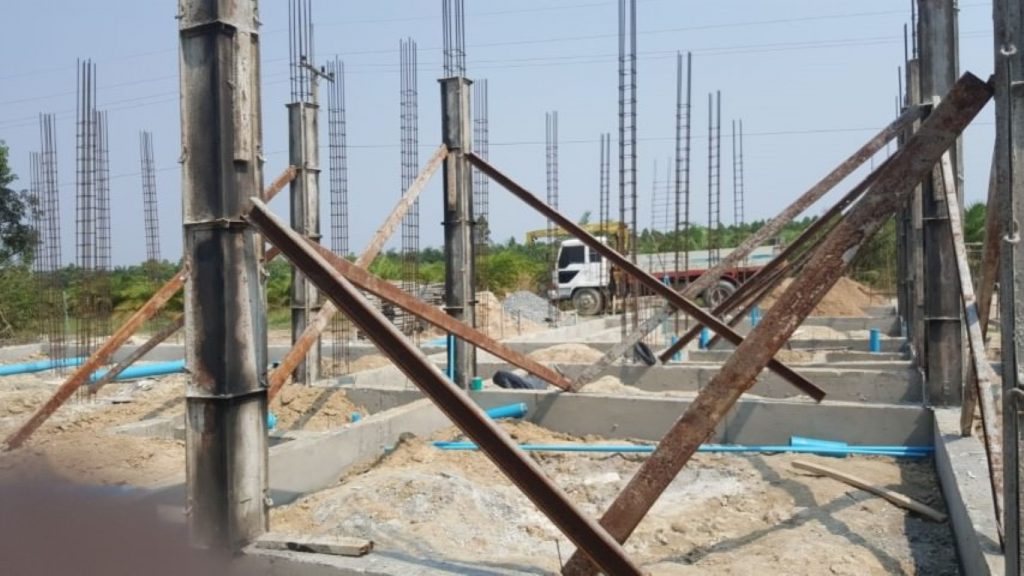
Our builder had experience in laying plumbing lines to get the correct slopes for efficient run off so no specialist was needed. As with most house builds, our actual build was 50cm above the surrounding, raised-up ground level. This made it a lot easier to get those ‘falls’. As it was detailed on the approved plans, we all knew the exact location of every shower, wash basin, sink, toilet and tap. Therefore, it was easy for the builder to mark that location on the ground, and lay the required pipework from each point to the external wall. This was of course carried out before the floor slab was cast.
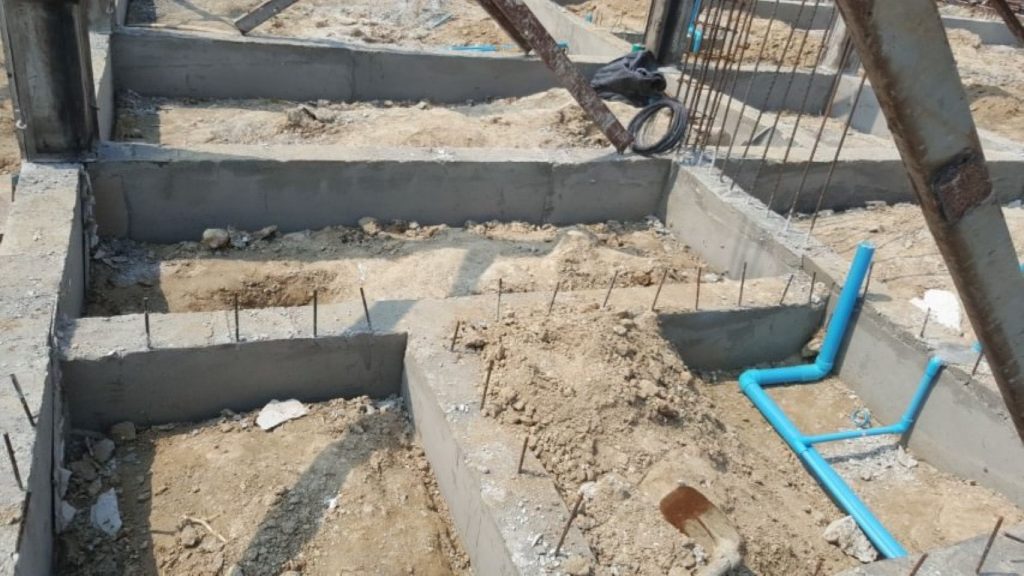
As part of the installation and where needed, the builder included the ‘P-traps’ in the line to prevent noxious odours coming back up the pipe and into the bathrooms. This another area that can be overlooked – make sure, if you are building in the future that this requirement is stated in the contract. You will have plenty of time, sitting in your new home and with a smelly drain, to regret for not planning this one!

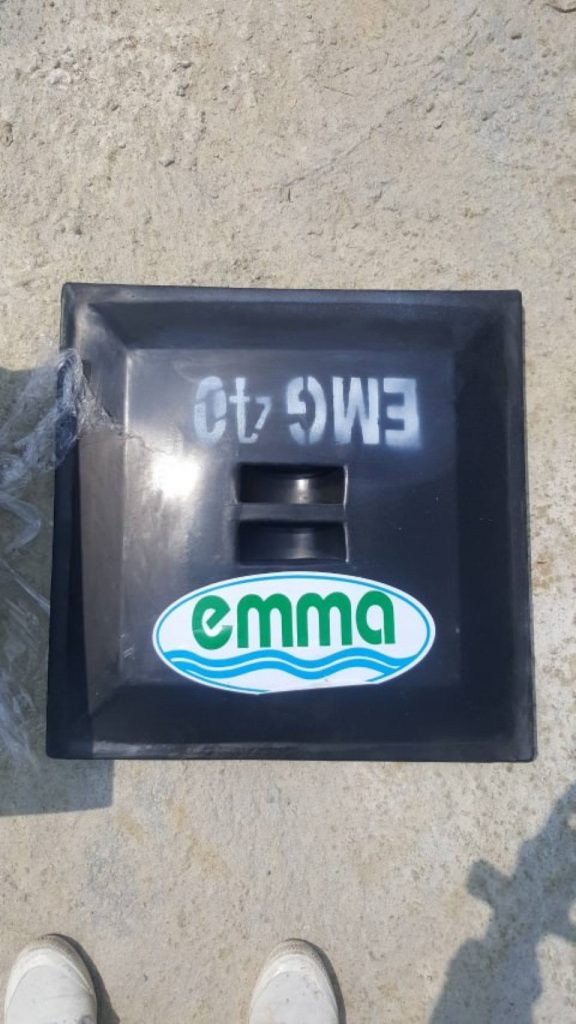
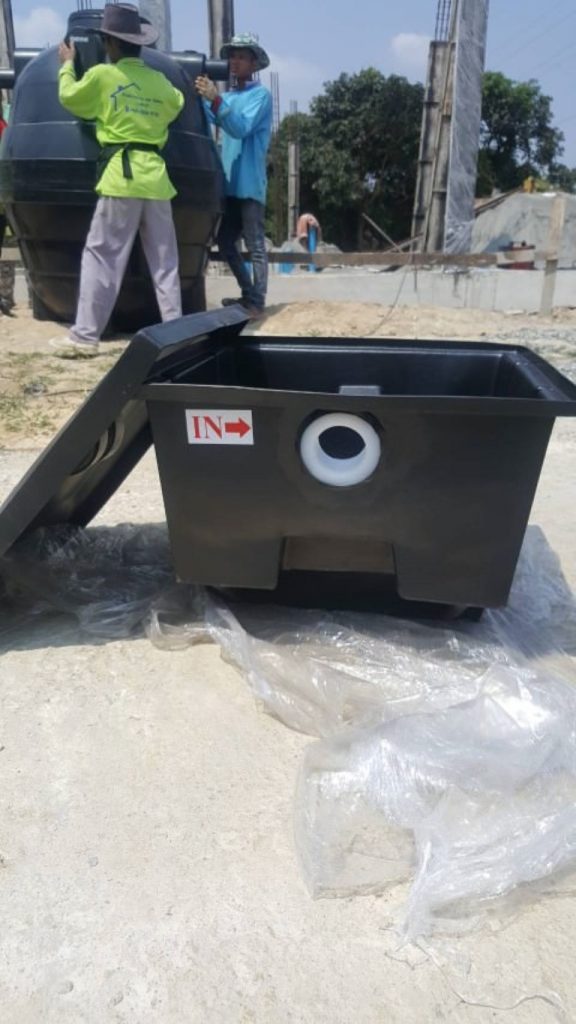
In addition, we also fitted 40Litre grease traps to the outflow. This was necessary to ‘hold’ the oils / greases, etc. that were washed from plates and pans, from entering the grey water disposal area (field drain). If these traps were not fitted, the greases travelling down the line would congeal and ultimately block the drain field function. It’s an easier matter to periodically clear out those traps and they are much more manageable and accessible.

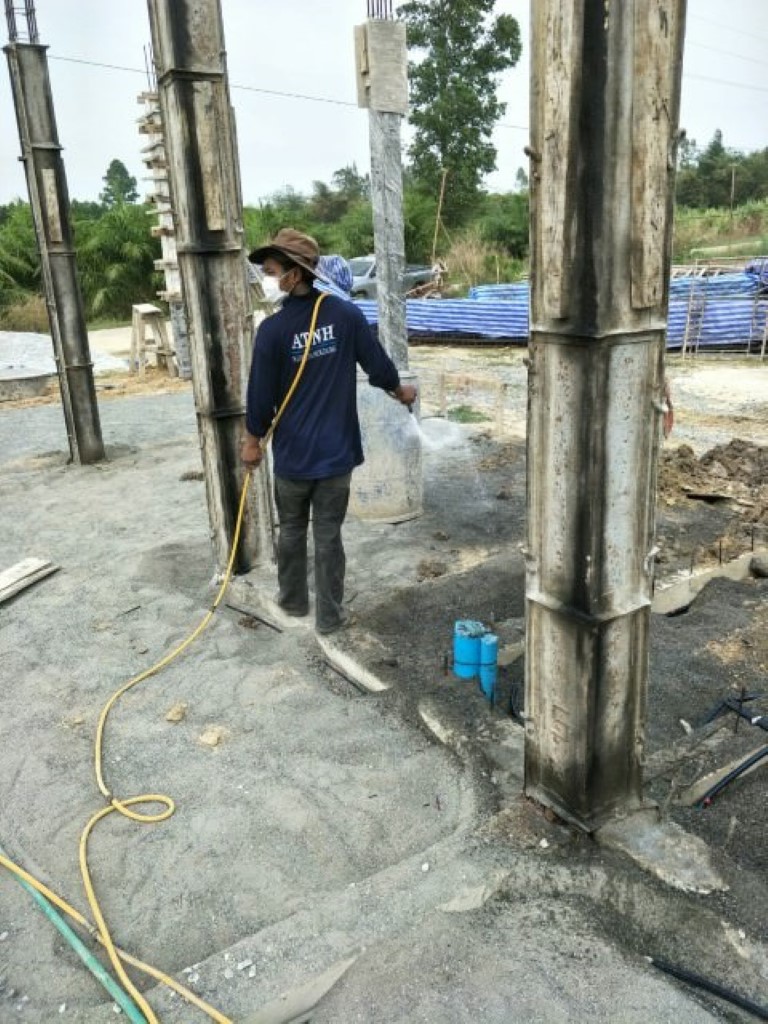
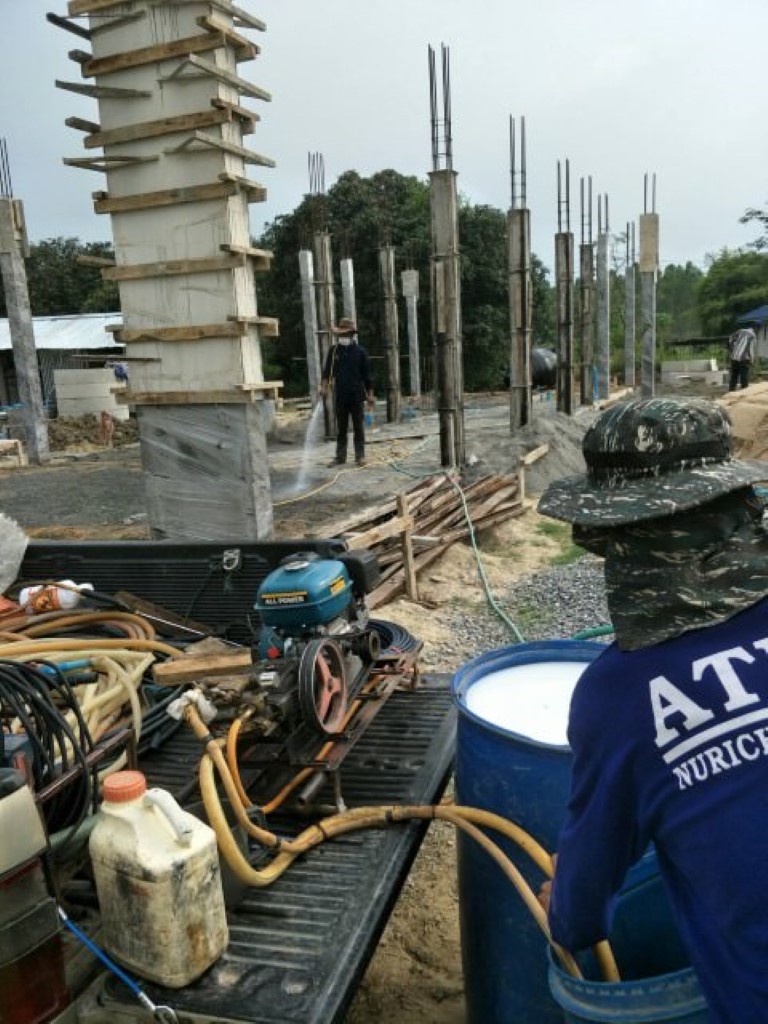
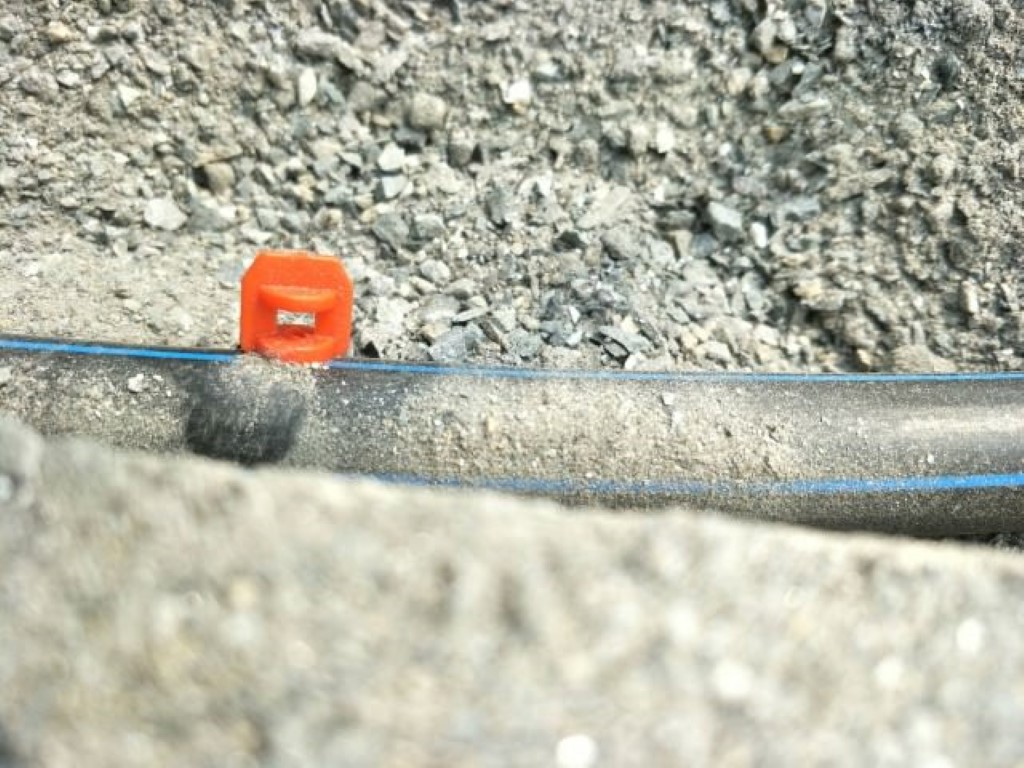
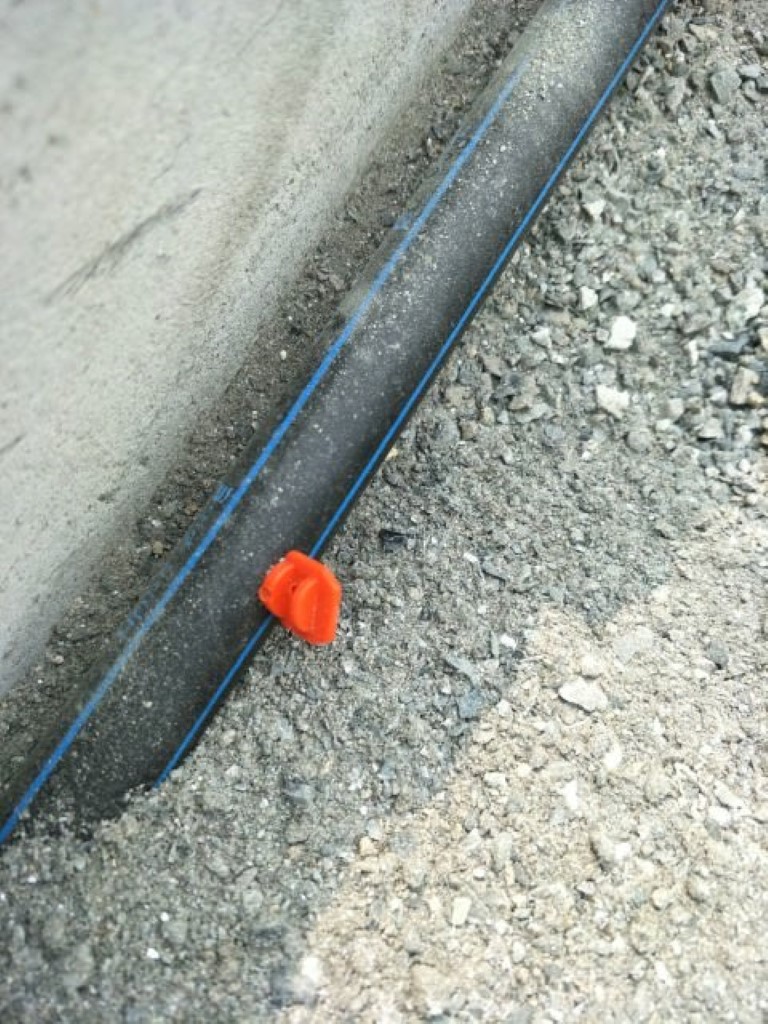
Termite control pipelines were also added at this time. In fact, as mentioned in our contract, I had forgotten to include termite control in the document! However, our builder was a professional. He knew it was a requirement and he had already built its inclusion into the costings. The pipe network and spray nozzles, terminating at various points around the base of the house, and all under the ground floor slab were placed, so when I came along, panicking at my omission, he had already laid those all-important termite lines under the ground floor slab!

The placement of all the plumbing and pest control concluded this part of the ground floor build. See the separate post on Termites elsewhere on this site.

Next we need to cast the ground floor slab.

Termites

General Construction

They live in colonies of…millions. They love to eat wood. Your building’s wood. Your wood.
They are everywhere.

You will never eradicate termites. It’s a sort of never-ending game where, for a time you are on top and they ‘seem’ to have disappeared, then one day you see little lines of 6-legged insects striding purposefully to and from your… kitchen or food store. You may even see those same insects entering and leaving through a tiny hole in a window frame or under a door.

No…you cannot rid the plot of termites but you can control them – reduce their numbers, steer them away from your food and your wood. You do this by careful choice of the wood you use, efficient sealing of all ways into the house, keeping the kitchen clean and tidy and of course…termite control chemicals.

Those chemicals and their application should be planned long before the base of your build because the feed pipes and spray nozzles need to be under the house. Once installed they should be put to immediate and continuous work. Apply the chemicals straight away, then start a contract with the termite control company to top up those chemicals on a regular basis to maintain the level of deterrent.

A clean and tidy kitchen? Yes. Keep food in the fridge or in sealed containers. Clear up spilt food, don’t drop crumbs, or leave food out for the dog… because you are also leaving it out for the termites and ants. Maybe they don’t want to eat the food but they are attracted to the smell, and will quickly put a scent trail down to the kitchen for other insects to follow. This is how you get overrun with the termites and ants.

Termites chew wood. They love wood but some woods are off their menu. We all know of teak and its anti-termite properties in the resin. Also Mae Daeng, which is actually harder than teak is termite resistant. There are others. Plan your wood to avoid heartache when those termites reduce your beautiful wooden piece to sawdust!

Take a trip around your house, both inside and out when it is finished. Look for holes or cracks, gaps under doors, poorly sealed windows, etc. plug all those holes and cracks. Re seal the windows, fit door air extruders. In short, try to ‘termite-proof‘ the place.

You can’t avoid them, but plan to live with them…on your terms.

Good luck!!

Chairs

General Construction

Had a couple of questions about chairs. As in…’’what are they?!’’

No…it’s not the type we recline on at the end of the day, when the house is long finished and the day’s work is done, with a sundowner. Not the type you pull up at the table for your breakfast. Not even those portable ones you take to the beach in the hope of staying comfortable.

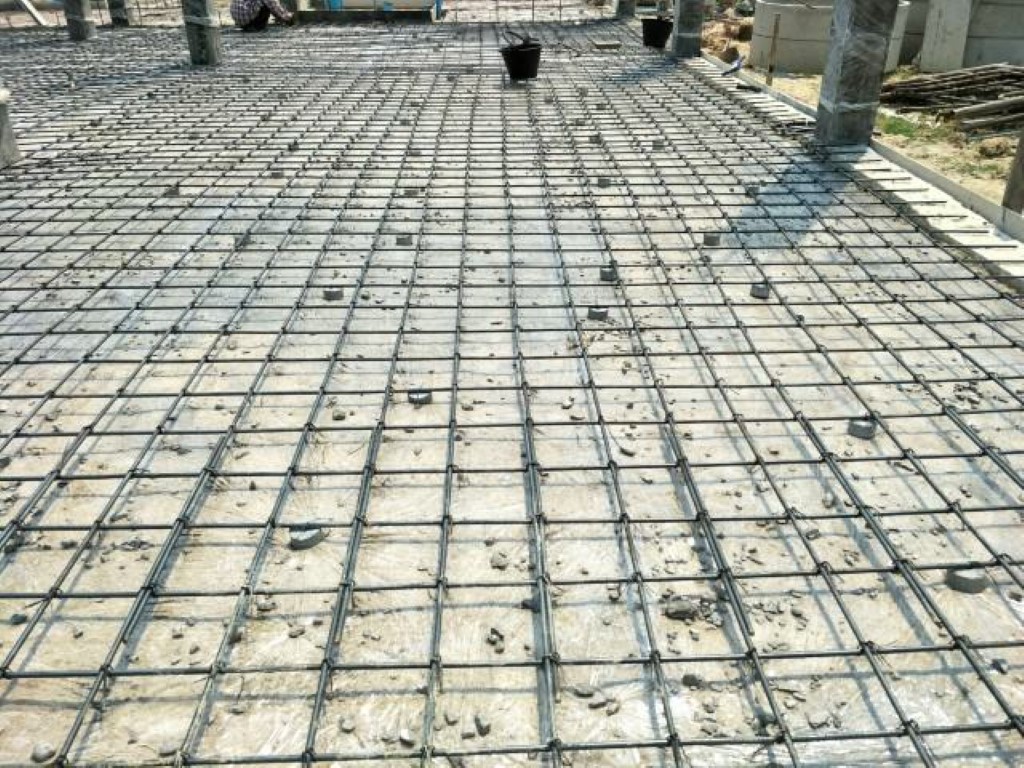
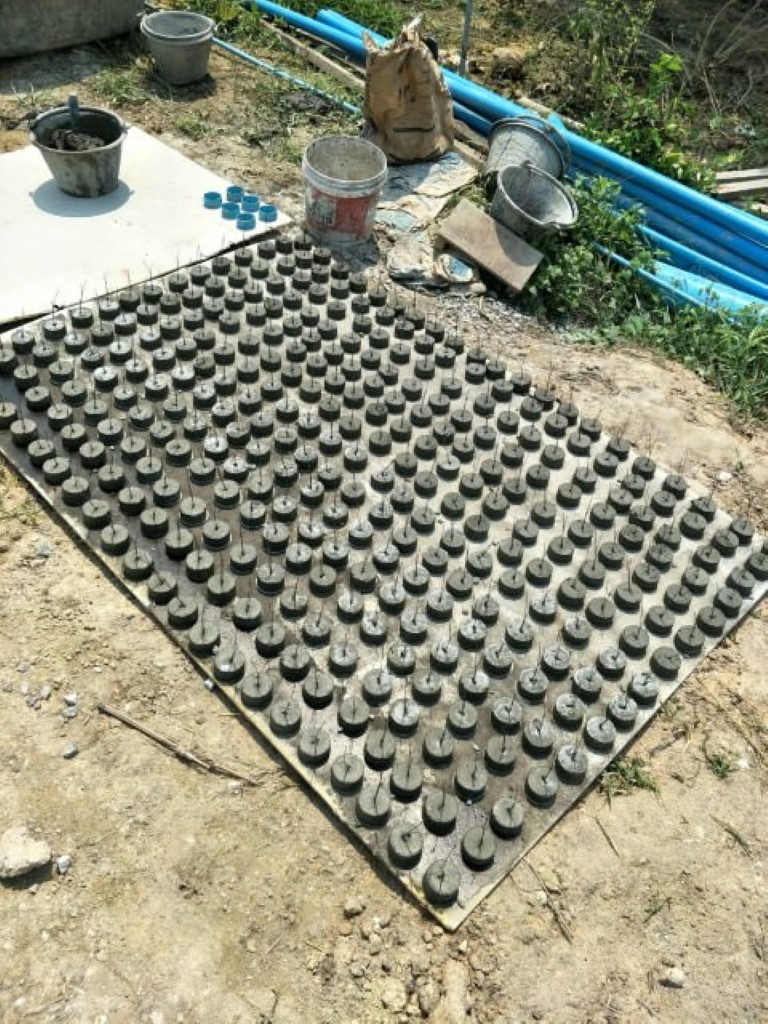
We are talking about chairs in construction, and that means…the supports for the rebar.

Supports for rebar? I hear you ask. Why does one need to ‘support’ rebar? Its metal. It’s solid. Strong. What support are you talking about?

Ok. I’m talking about the kind that is needed when rebar is encased in concrete, to form that RC structure.

You see, the rebar IS strong…and heavy. If you placed the rebar grid in the area to pour the floor, it would sit on the bottom, and that’s no good. Similarly, if you placed the rebar column or beam cage in the shuttering and it touched the bottom, or the side…that’s no good either.

Why not?

OK… the reason is simple. The metal contains iron, and as we all know, when iron comes into contact with water, or moist soil, or the moisture in the air all around us, it will start to decay. It forms a brittle, reddish-brown crust, which will only get deeper with time, if it is untreated.

You may know it as …rust.

Note the metal rebar is good for strength and rigidity, if it is in good condition. Rust has no inherent strength, quite the opposite in fact. It has no strength at all. So to prevent the metal turning into rust, we have to keep the moisture away from it. That’s what the concrete does. But if the metal is not completely covered in the concrete, the decay will start, will eat into the metal inside the concrete and eventually, the structure will FAIL.

Yes fail.

In order to stop this, the metal part of that reinforced concrete must be completely enclosed in concrete. When casting pre-made pieces such as floor planks, the metal is positioned in the factory, but our on site, for ring beams, floors and columns, it’s down to the building team to ensure the metal is in the right location. The chairs, or ‘rebar support’ move the rebar metal into the centre of the structure being cast, or are placed to push the metal away from the sides of the structure before the concrete is added.

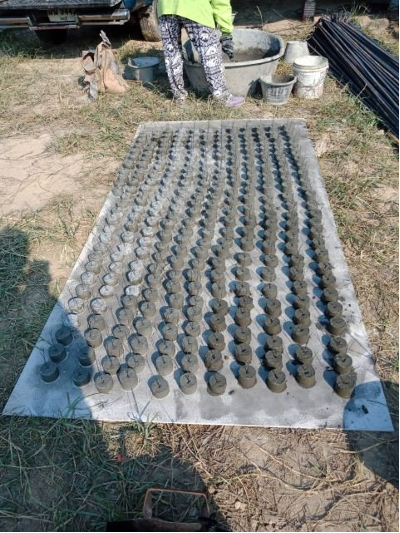
You can buy plastic chairs, or, as most do (if they are clued up and even using chairs – some builders do not!), you can make them yourself. It is basically a small circle of concrete with a couple of wires set into the concrete. Once hardened, the concrete chair can be positioned and the wires used to secure it and prevent movement when the concrete is added.

A simple but very effective and important solution.

First floor column shuttering and pouring

Ground Floor Construction

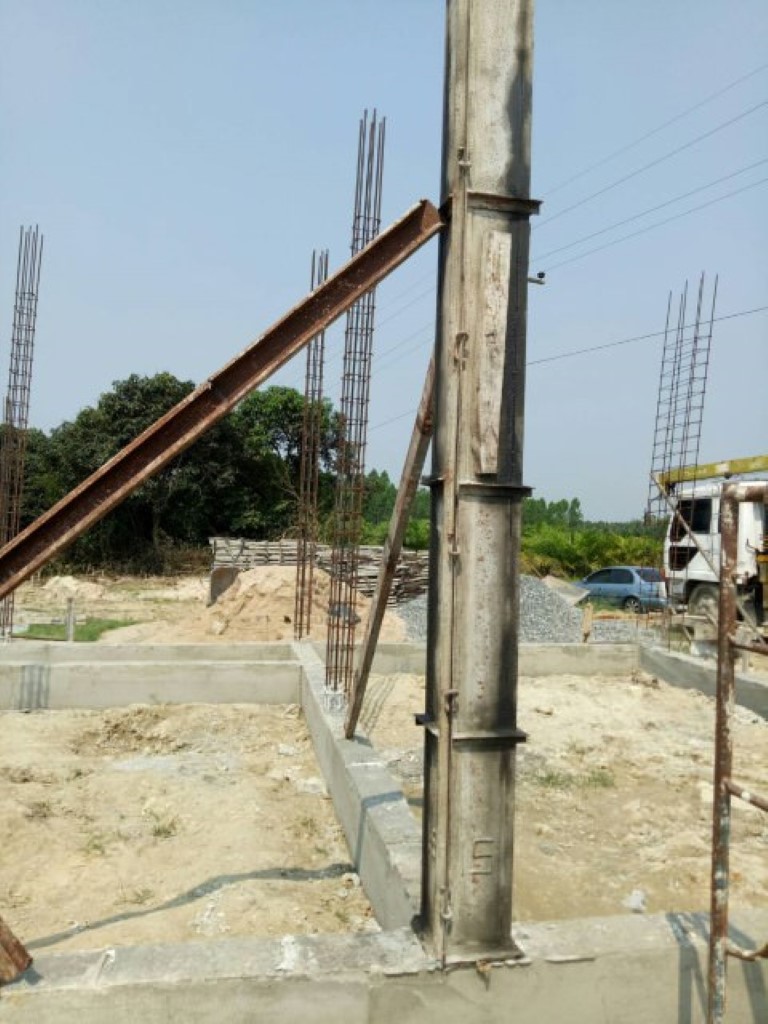
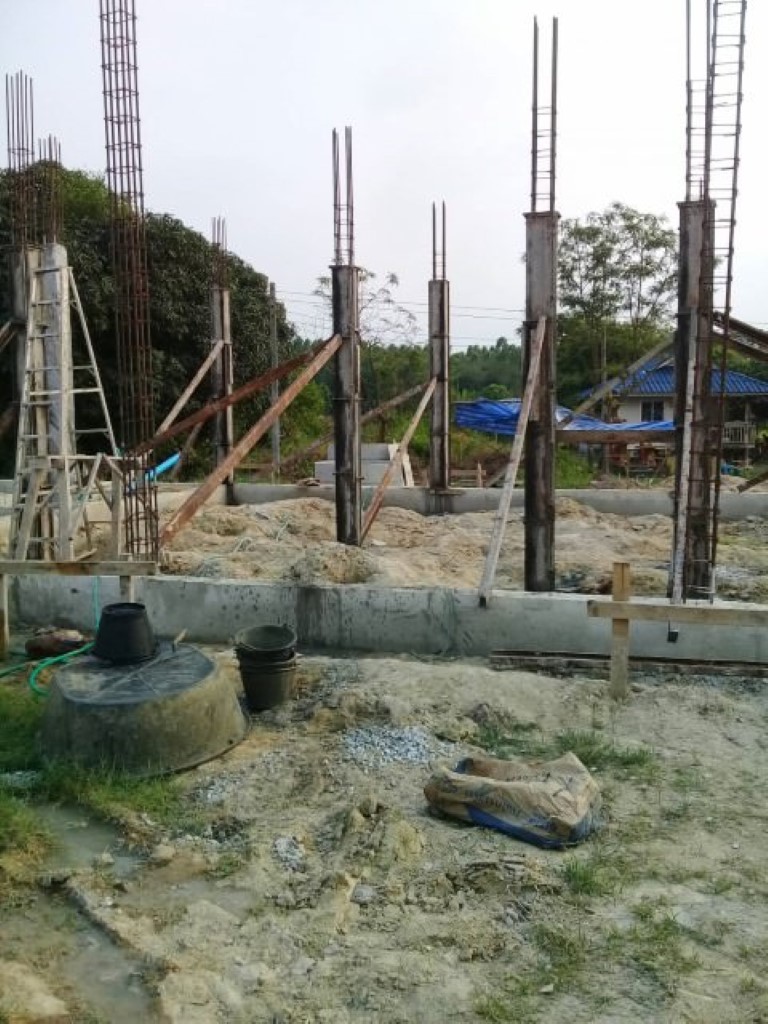
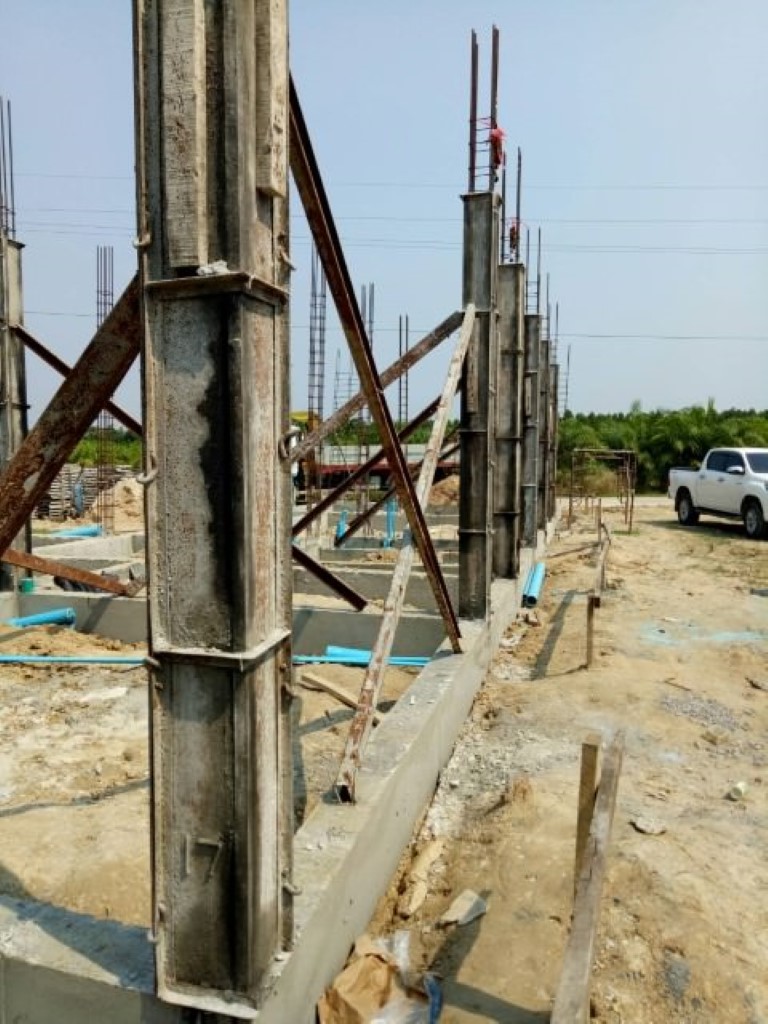
Once the ring beam ‘foundations’ were finished it was time to turn to the uprights – those RC columns that would hold up the first floor (and the rest of the house)

Thai building methods use the tried and tested RC frame for construction. A linked re-enforced concrete network formed the frame of the building, and all the external and internal walls are non-load-bearing. It’s the same method as used in skyscrapers, but obviously on a much, much smaller scale!

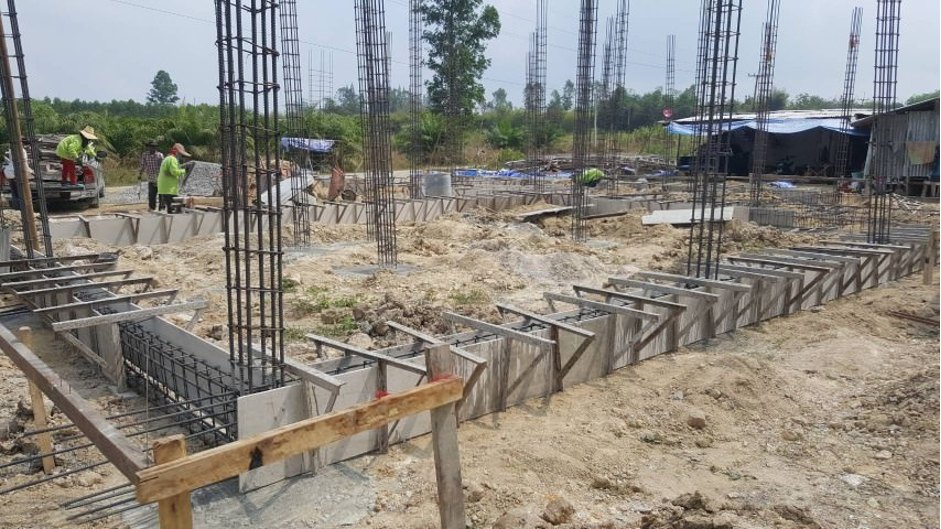
The steel cages for the Thai House Build were already in place. They had been previously tied to the ring beam and foundation plan before that foundation was cast. Now the builder needed to shutter up those vertical cages and cast concrete to form a series of re-enforced concrete uprights, or columns.

The column cage shutters were purpose built, and were different to the arrangements for the ring beam. Of course, our builder had those column shutters so there was no need for a trip to the builders’ merchants.

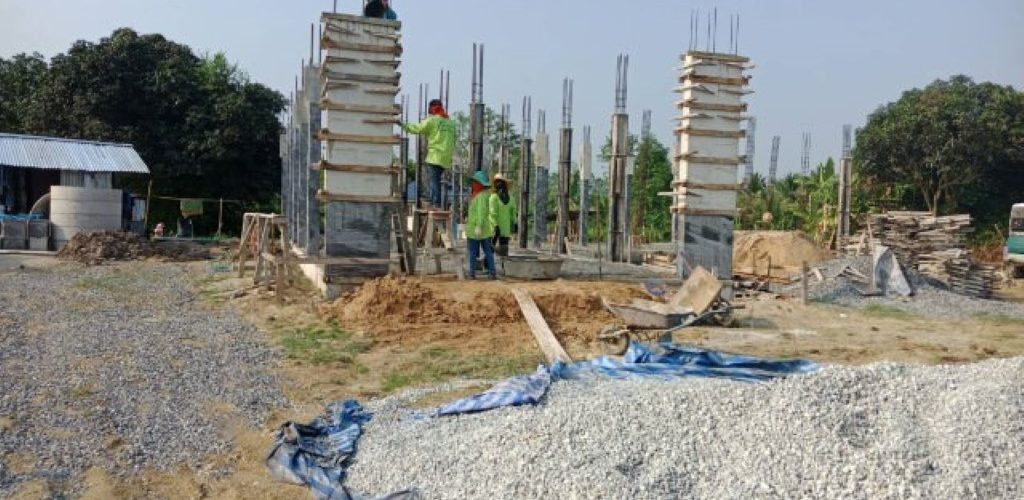
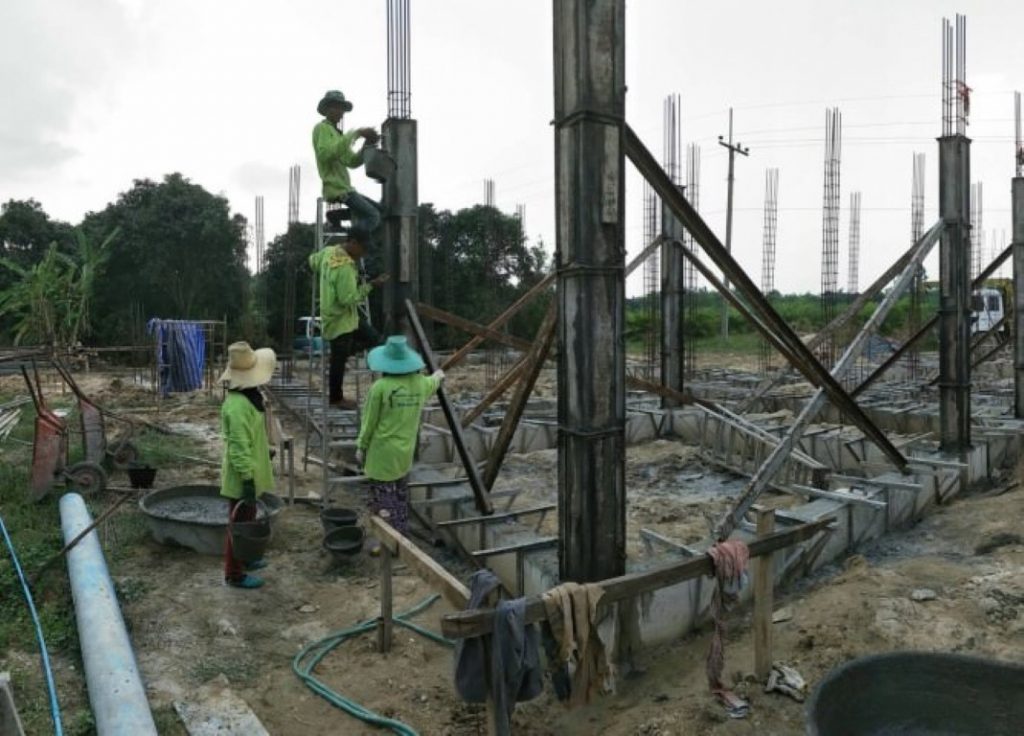
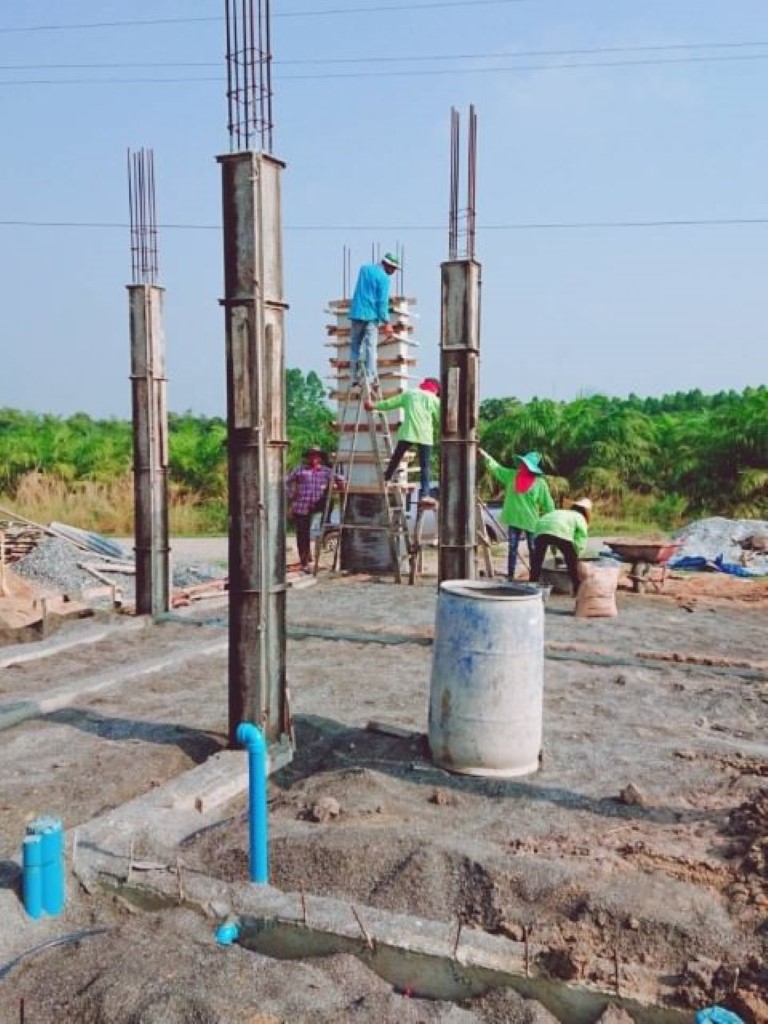
The column shuttering was put into place, and bolted together, around those vertical RC cages. The builders then used the concrete chairs the position the cage in the middle of the shutting, so that it would end up central to the column once poured.

After that, of course there was a final check to make sure the shutters were secure and no leaks. Just imagine if the shuttering was not fully secured, and the concrete was poured in. and the shutter popped open? Even if the shutter is not 100% secure, the concrete can ‘run out’. Either case will result in a mess all over the build, wasted concrete and wasted time while it is cleaned up.

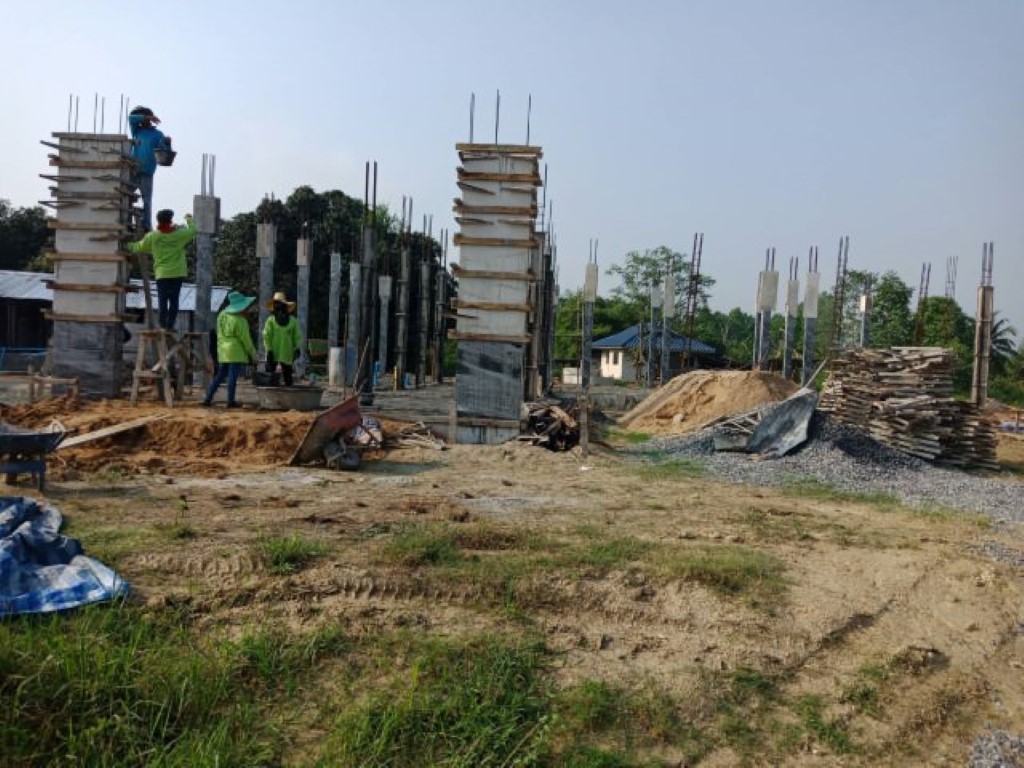
A little later, and the concrete was made ready for the column pour. Although K.Pot had all the gear, for this job, it was placed into the shuttering by hand. Plastic buckets tipped into the top! This is fairly standard practice in Thailand.

The larger columns, at the end of each zone were also poured this way.

To ensure the concrete had flowed around that rebar ‘core’ and that correct settlement had occurred. K.Pot had the use of a vibrator. This powered device agitated the shutter, causing a more fluid consistency of for the concrete that had just been poured, encouraging it to get into every area. There is an important reason for this. Any air pockets, or voids in the concrete would weaken the structure.

As you can see, at the same time, the ground floor was being backfilled with fine aggregate ready to company and pour the floor slab too. This will be covered in another post, even though the two activities overlap.

You can also see that the plumbing is in place and this too will be the subject of another post.

Striking the ring beam shutter

Building foundations

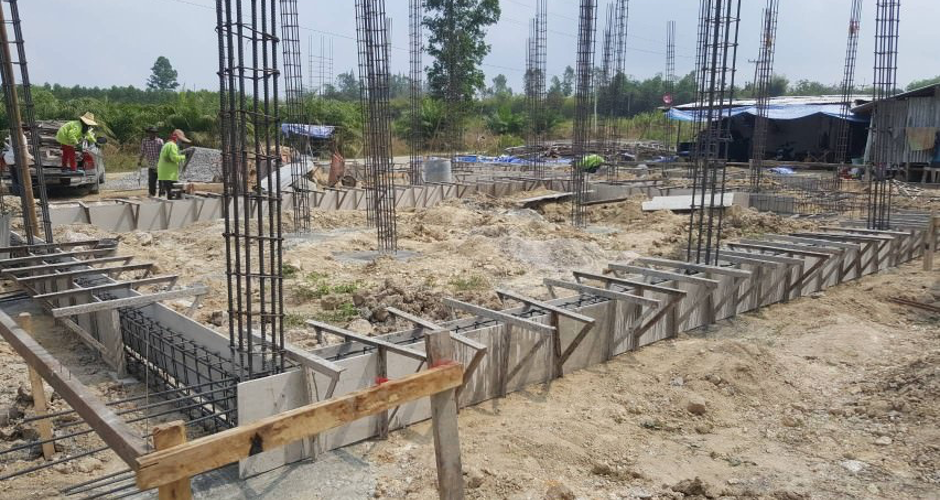
So, after the shutters were placed, the concrete poured and then left to harden, the next stage was removing those shutters.

It is crucial to leave the shutters on while the concrete goes off, or hardens. As stated before, concrete hardening is a chemical process, not a ‘drying out’ – the longer, within reason, you keep it wetted down, the harder it will become. Wetted down does not mean ‘keep it in liquid form, it means keep the hardening concrete damp this is aided , especially with columns, by wrapping those columns in plastic, once the formwork is removed.

This is not necessary with the ring beam – just remove (strike) the shutters once the concrete has hardened, and wash the beam down with water.

The team arrived bright and early to strike the shutters. K.Dee, the foreman had the team organised and everyone knew what to do.

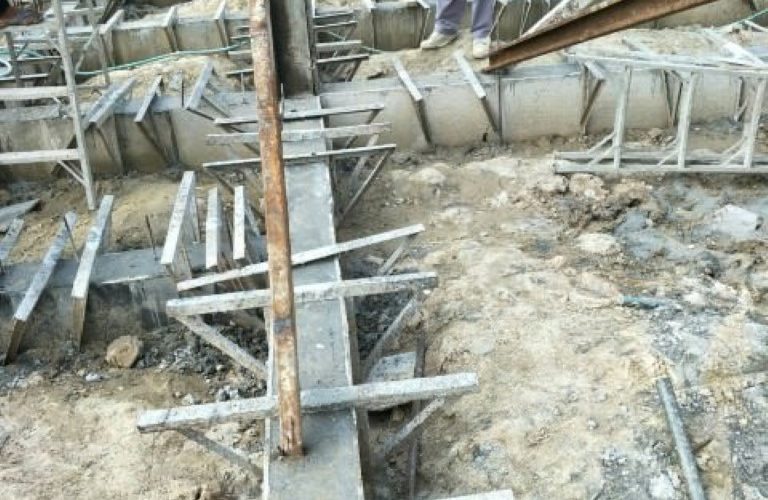
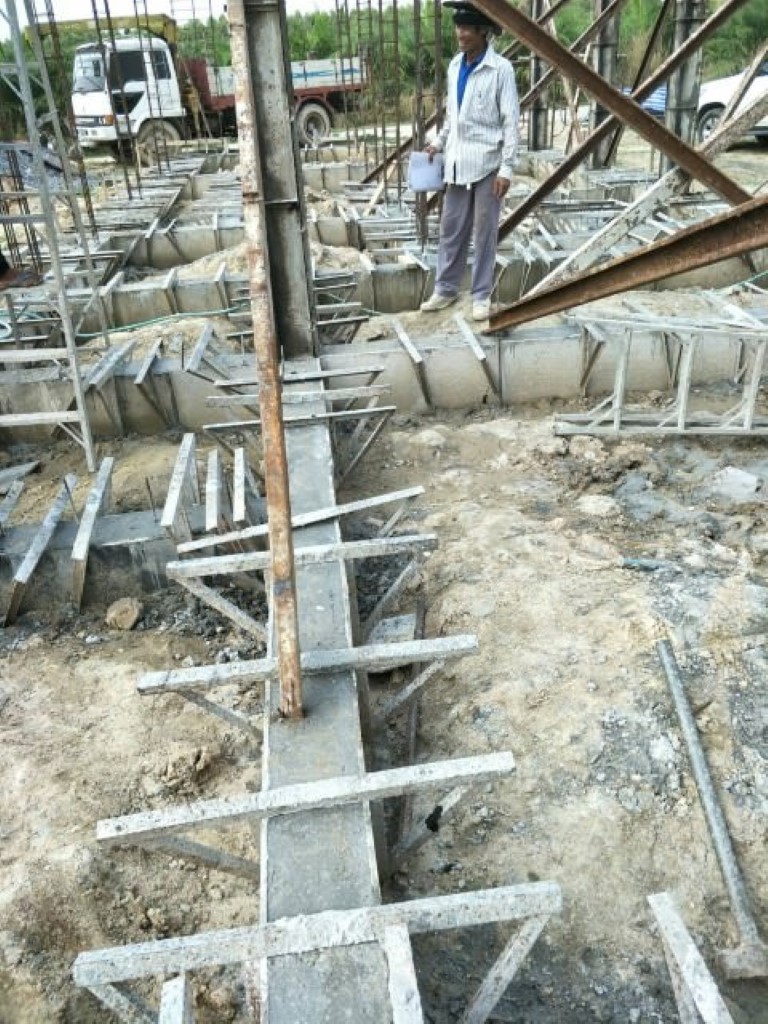
Firstly, a final check that it was ‘time’ to remove the shutters. Once completed, the next stage was the removal of the clamps holding the shuttering boards in place. Now, only the adhesion between the poured concrete, now in beam form, and the shuttering boards themselves were keeping those boards in place.

Before the concrete was poured, K.Dee had used a shutter release agent, a spray oil to make sure the shutters would come away cleanly. It is possible to apply the oil using a brush but it takes longer, and even using old engine or cooking oil – again, not the recommended option but some builders will use anything no matter how unsuitable , just to save a few dollars!

Now came the striking. It is said the word came from the action of hitting, or striking the top of the shutter (not the side) with a small hammer to break any residual bond from the treated shutter board. If it went to plan, the shutter board should just fall away, leaving a smooth surface on the cast concrete.

So it was with our ring beam. The team worked round the shutter boards, removing them. Some needed that tap with the hammer, some just fell away when the clamp were removed.

We ended up with a complex ring beam, and all ground floor cross-members making up the foundation design for the ground floor, and all sitting on the piles, that were described in an earlier post.

Growing out and up from this cast foundation were the rebar cages that were needed to form the ground floor uprights.., details for that are in an upcoming post in another post.

Managing a project remotely

Background

First of all…. if you can avoid this…do so! Trying to oversee the build without actually going to site can let smaller issues go unresolved. You do not develop the rapport with the build team. You don’t get a ‘feel’ for the house as it takes shape. Being on hand is always better if possible, but sometimes, it is not possible.

In my case, the remote project management was unavoidable, because I was in the Middle East, and PJ was in Bangkok, over 100 Km from the site. If you add in that we did not have a car, and in any case she was nervous of driving such a distance on her own (she was right to be, even though she has a full driving licence, because you cannot foresee what other, less capable drivers might do in your vicinity!)

As a result of this, the house project needed remote management, so if you are in this situation, you need to have a few things in place.

  • That contract

Signed agreed and a copy with both parties. This becomes your (and the builder’s) reference and depending on how you write it, and what you include, it should steer the project along. This is why I stress that it is important to take your time creating the contract, and make sure everything is covered. It is important too, that the builder is clear about what the contract controls – he needs to understand it. He need to understand that he has to follow it. He will sign to confirm this.

A combination of a well-translated contract and discussion in Thai and English, until everyone is satisfied, all questions have been answered etc. is vital. Don’t rush this. For anyone who may be interested, a copy of the TD Towers contract is available to purchase if required. This will guide you how to create your own contract, and possibly help you to avoid leaving out anything vital! Click here to contact me for more information.

  • Site representation

This is very important.

So…you can’t be there. That’s understood. So… are you going to just let the builder and his team ‘get on with it’ and several months later, they hand you the keys?(and of course, you have made all the payments). If you are wise, the answer is…of course not!

Nominate someone to ‘check’ on the progress, someone with some build knowledge, and not just a spectator. Provide them a copy of the plans and the contract, so they have the project documents to refer to if there is a doubt.

Your nominee must be empowered to make a judgement on site, as in effect they are… your official representative. It is up to you how much power you give them under that title. Finally, they must communicate with you along the way.

In our case, we employed the Engineer from the OrBorTor’s office! He was perfect for the role as he had approved the plan so he knew exactly what should be done and how it was to be completed, based on best building practise. He has not let us down.

Additionally, PJ made unannounced visits to the site, to see for herself, and to be available face to face if the builder needed any clarifications.

  • Progress reports / photos

In the same way your site representative updates you, the builder needs to show he is progressing the build as per the contract and plans. This will need communication and more specifically, visual confirmation of the work. As part of his role, the builder should produce daily progress photos / videos and send them to you. This confirms work is completed, which is in the builder’s interest as he gets paid on completed sections

How we are paying for TD Towers

Background

Of course, when you set out to construct anything, anywhere…sooner or later you have to think about money. The finances. How it’s all going to be paid for. You may be lucky, and rich. Perhaps you were left some money by a distant relative, or you had a winning streak at the bookies.

Or perhaps you didn’t.

For most of us, the cost of the project is very important, because we need to know that we can afford to complete that project and not leave it ‘hanging’ with 80% completed, because the money ran out and we can complete it only after working and earning some more.

Actually, that’s not unheard of in Thailand. Unforeseen costs, or optimistic financial planning can bring a project to a stop, and it will restart once the funds are again in place and the builders are available. It happens but it’s not really ideal.

No, you need accurate costings, a final contract price agreed with the builder, with no hidden ‘extras’ (see my section on the contract in pre-start paperwork), and a payments schedule all worked out, and most importantly, that you have enough money to fulfil the contract you are agreeing and signing. This is the same, if you are building in Europe or in Thailand – people need to be paid! And more importantly, the builder needs to trust you. This is why I said that you need to spend enough time on the plans, costings, contract and financial backing arrangements – you cannot skim over it.

For us, the build costs were in Thailand so the labour cost is a LOT lower that in UK. Added to that, some raw materials were also cheaper – here you need to go out and research those lower costs. Understand the cost of a metre of concrete. How much rebar is? Plumbing supplies. Wood. It may seem crazy but how does that saying go? ‘If you fail to plan, then you plan to fail’, and the other one, ‘knowledge is power’ is also very true in this context.

So, we had an idea, we turned it into plans, we spoke to several builders, and we got prices. We were able to break down the selected contract value into agreed, sequential stage payments which meant we did not have to find, say 25% of the contract value up front.

From my work in the Middle East, and with a foresight of the build to come, I started saving for it about 4 years earlier. No… I did not have a 4 year pre-build plan but I knew I was going to build at some point and a chunk of savings was going to help. We had used some of those savings to purchase the land, and the rest was used to start the stage payments. I also had an independent savings plan with my last employer which I knew was going to pay for the final stage payment (if you read the contract section, you would know that the last payment was intentionally larger as it included much of the builders profit, payable after the snagging list – go have a look if you have not done so already!)

Meanwhile I was still working and saving. Each stage was around 30 days and there were 10 stages, so I just had to find the stage payment on time. Using some savings and some earnings, I was able to make all 10 payments though a couple of them were delayed slightly due to money being moved around!

However you plan to do it, look at what you want to build, and get the all-important build contract costings. Then, and you must do this – honestly look and make sure that you can afford to do it.  Don’t get swept up in the excitement of building a house, especially if accompanied by ‘encouragement’ from your better half (!). Don’t let your desire to build that dream cloud your judgement. Make sure you have the money, it’s as simple as that.

Now, what to do if it turns out that you don’t (quite) have the money?

Again, it’s quite simple.

Build something a little smaller, a little less grand. Do you really need 4 beds when 3 will do? You can add that swimming pool later, so leave it out of the contract. No need to go crazy with a big, western-style kitchen if your Thai partner does all the cooking outside. Maybe you don’t need hardwood flooring in absolutely every room? We went through this process. We chopped out the pool and put hardwood flooring in 3 rooms. Will it affect our enjoyment? Not one bit. We will add that pool at a later date. We will have wooden flooring in the main living room, and for most of the time anyway, we will be outside or under zone 2!

The other area you can cut costs is where you can do some of the work yourself. So, in our contract, we cut out the kitchen fabrication and fitting, because I knew I could do that myself later on. That can be a massive saving, and that’s just one area. Same goes for dressing rooms / fitted wardrobes, if you are a handyman. We will also landscape and plant the garden, making another big saving.

Finally, it really helps to have a great builder that you can work with to make it all happen. He needs to be flexible if you want to take on some of the work, and cut parts of the contract value accordingly.

The equipment we use to produce this blog

Background

Not everyone realises the time and effort, plus the equipment requirement needed, to produce blog content! We have had a few requests to know what cameras, software, etc. we use to produce this blog, so here goes…

Still images

All photos were shot using a Canon 5D DSLR, a Canon 7D DSLR, a Canon PowerShot, and a Samsung Galaxy Note Smartphone.

Lenses… just 2. the Canon 70-200mm f2.8 IS III USM and the Sigma 10-20mm, plus of course the phonecam shots

Video footage

While videos could also be shot using the above cameras, in fact for ease and simplicity, all video footage was shot using the Galaxy Note and Galaxy S Smartphones. (S5, S8+, S10, and S20 Ultra).

Accessories

No drones used. No image stabilising gimbals used. Gitzo GT1543T carbon fibre tripod (now superseded by the GT1555T) used when shooting still with the DSLRs.

Photo Editing

Almost exclusively Adobe LightRoom, though there have been some parts completed using Capture One Pro.

Video editing

Exclusively Filmora. The latest version, Filmora 10 is absolutely amazing.

Blog writing

Good old Microsoft Word (Part of Microsoft Office2016). All the spell-checking and grammar suggestions you need. You may even have it already!

Website template

One of the many created by WordPress, who have a range of free and paid for options. This template is the ILLUSTRATR paid option.

Web hosting

Services provided by Webfundament

Plinth beam Shuttering and casting

Building foundations

Once all the connecting rebar was placed between the columns it was time to start concreting the connecting beams.

Shuttering

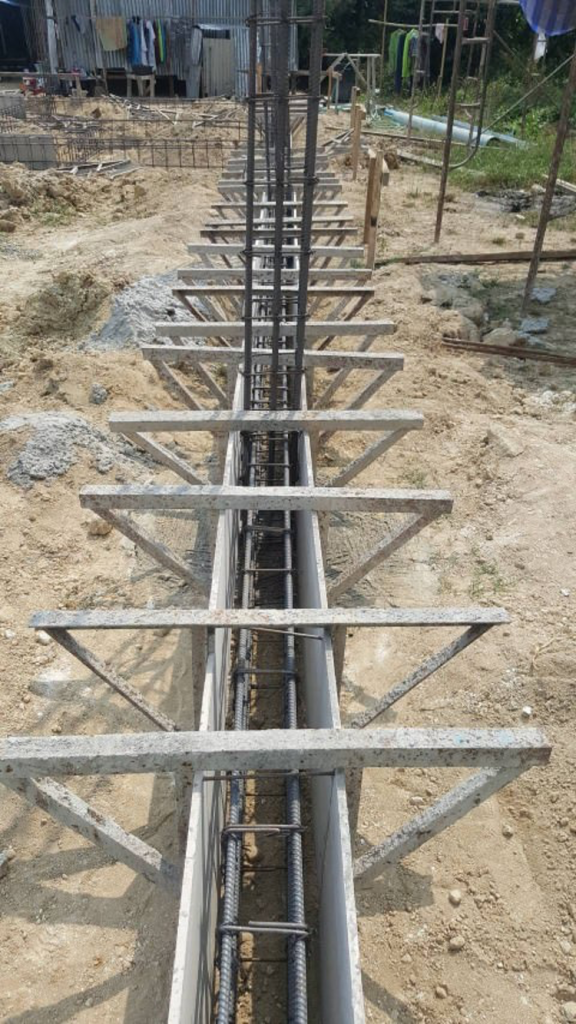
Wooden formers were placed under and at each side of the rebar cage, and secured with purpose-build clamps. The shutter was then checked for alignment and integrity – we did not want any concrete leaking out of a joint or worse…bursting the shutter and spilling all the concrete.

Spacers were then fitted to the cage sides and base to ensure 100% of the steel rebar would be encased in the concrete once it had hardened. This was to prevent water getting to bare metal and corroding it, with potential structural failure somewhere down the line.

Casting

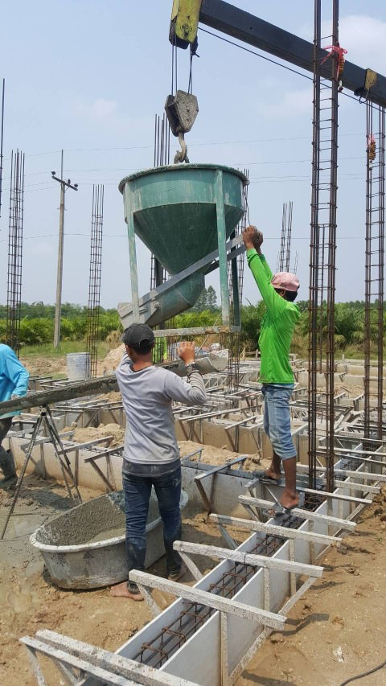
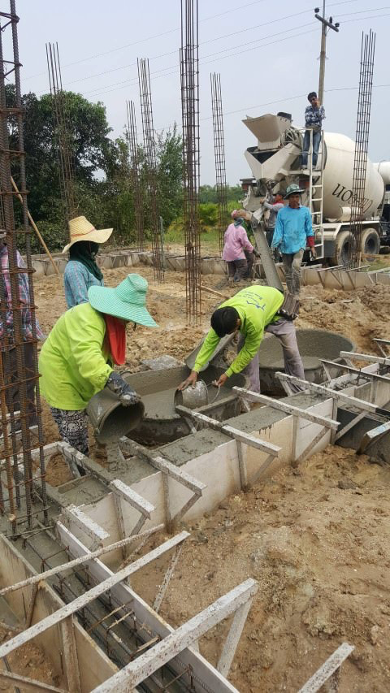
No…we’re not fishing, we are concreting! With the shutter placed and checked, all was ready for the concrete. Concrete was supplied externally and was cast using the concrete mixer and a concrete skip that K.Pot had, to go with his crane. Some hand-mixed concrete was used to finish off the beams as well.

After the concrete started to pour into the shutter and around the rebar cage, a vibrator was used to settle the concrete. This was to remove and air bubbles or air-locks anywhere in the beam – obviously they would be a potential weak spot if left.

Placing the plinth beam rebar

Building foundations

Next job was to prepare the beam that would connect all those concreted piles together. As most of you know, all the strength in the type of build we are doing here comes in the re-enforced Concrete frame – from the piles, footings, plinth and ring beams and the connecting columns – this frame is what carries the weight of the house. It is exactly the same construction technique as that used to build multi-floor apartment buildings but on a smaller scale

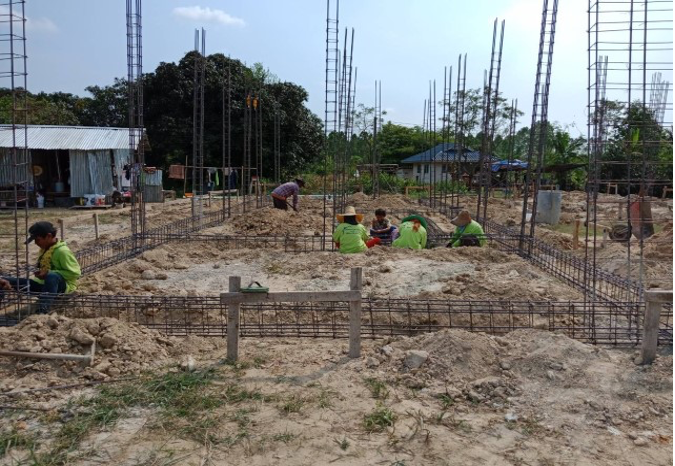
We already placed the piles and formed the pile caps on the top of each one, and the steel that would form the vertical columns on top of that. Next task was to connect all those vertical rebar columns with an RC frame… a plinth beam.

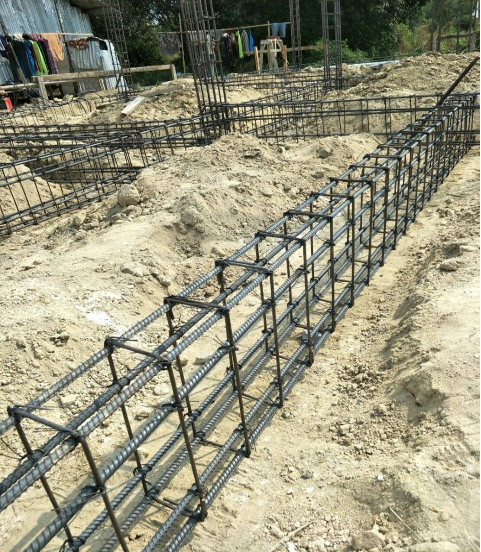
Long straight steel cages were again constructed on site, of varying lengths, to fit between those columns. Then began the task of placing each rebar cage and tying it to the column.